BigQuery
Setup Guide
Step 1 - Find Your Project ID
Locate your Google Cloud Project ID, as you'll need it to configure the destination.
Step 2 - Grant Service Account Permissions
-
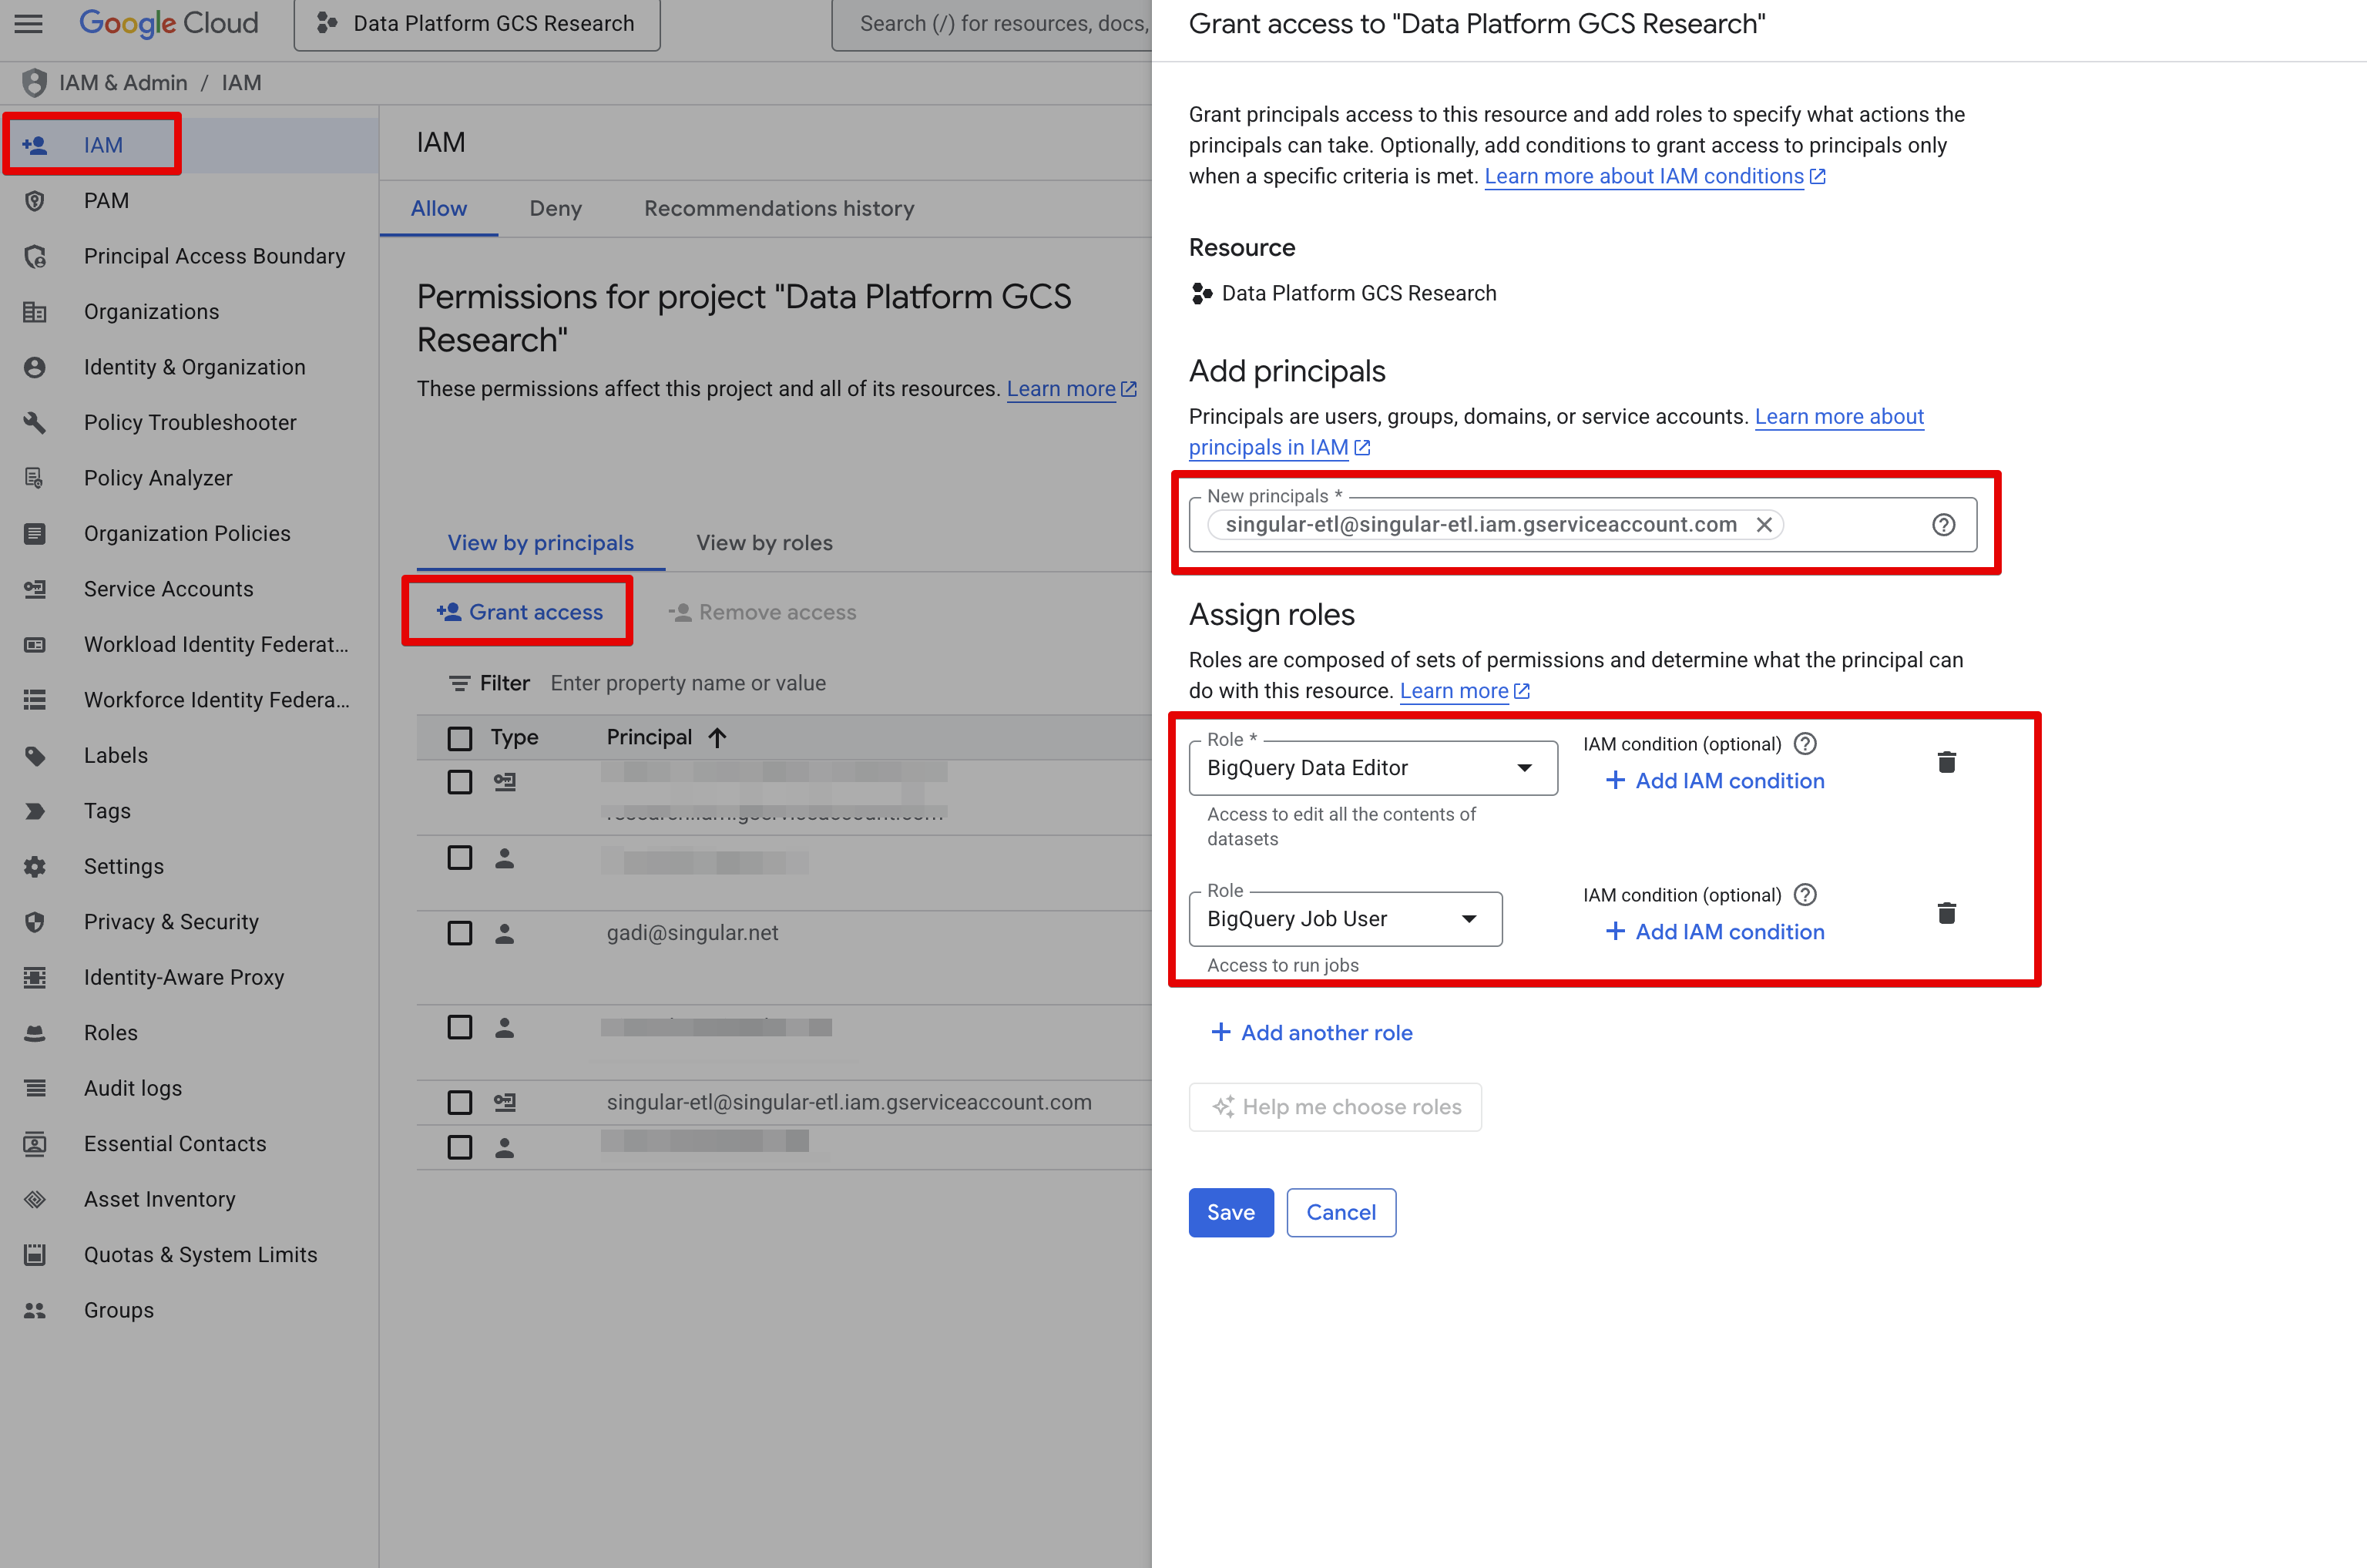
Open the IAM settings of the Google Cloud Project that contains your BigQuery database: https://console.cloud.google.com/iam-admin/iam
-
Click on "Grant Access" and provide access to our service account
-
Principal: singular-etl@singular-etl.iam.gserviceaccount.com
-
Assigned Roles:
-
"BigQuery Data Editor" (
bigquery.dataEditor) role, which includes:- Creating and managing datasets
- Creating, updating, and deleting tables
- Reading and writing data to tables
- Running queries
-
"BigQuery Job User" (
bigquery.jobUser) role, which includes:- Creating and managing BigQuery jobs
- Running load operations
- Creating and managing query jobs
-
Alternatively, you can assign these specific permissions:
bigquery.datasets.getbigquery.datasets.createbigquery.tables.getbigquery.tables.createbigquery.tables.updatebigquery.tables.deletebigquery.tables.getDatabigquery.jobs.createbigquery.jobs.get
-
Step 3 (Optional) - Use Your Own Service Account
If you prefer to use your own service account instead of the Extract service account, follow Google's documentation on creating a service account key to set up service account key authentication.
After creating your own service account, make sure you grant it all the permissions from Step 2 in the project that contains your BigQuery database.
Step 4 - Complete the Setup
Enter your Project ID and, if using your own service account, provide the Service Account Key to finalize the setup.