Amazon S3
Prerequisites
- Admin access to your AWS Console to create/configure an S3 bucket and permissions
Setup Guide
Create an S3 bucket (skip if you already have one you want to use)
-
Login to your AWS Console and switch to the desired region. We recommend choosing the same region you have the rest of your compute/storage/databases (Redshift, Postgres, EC2, EKS, etc).
-
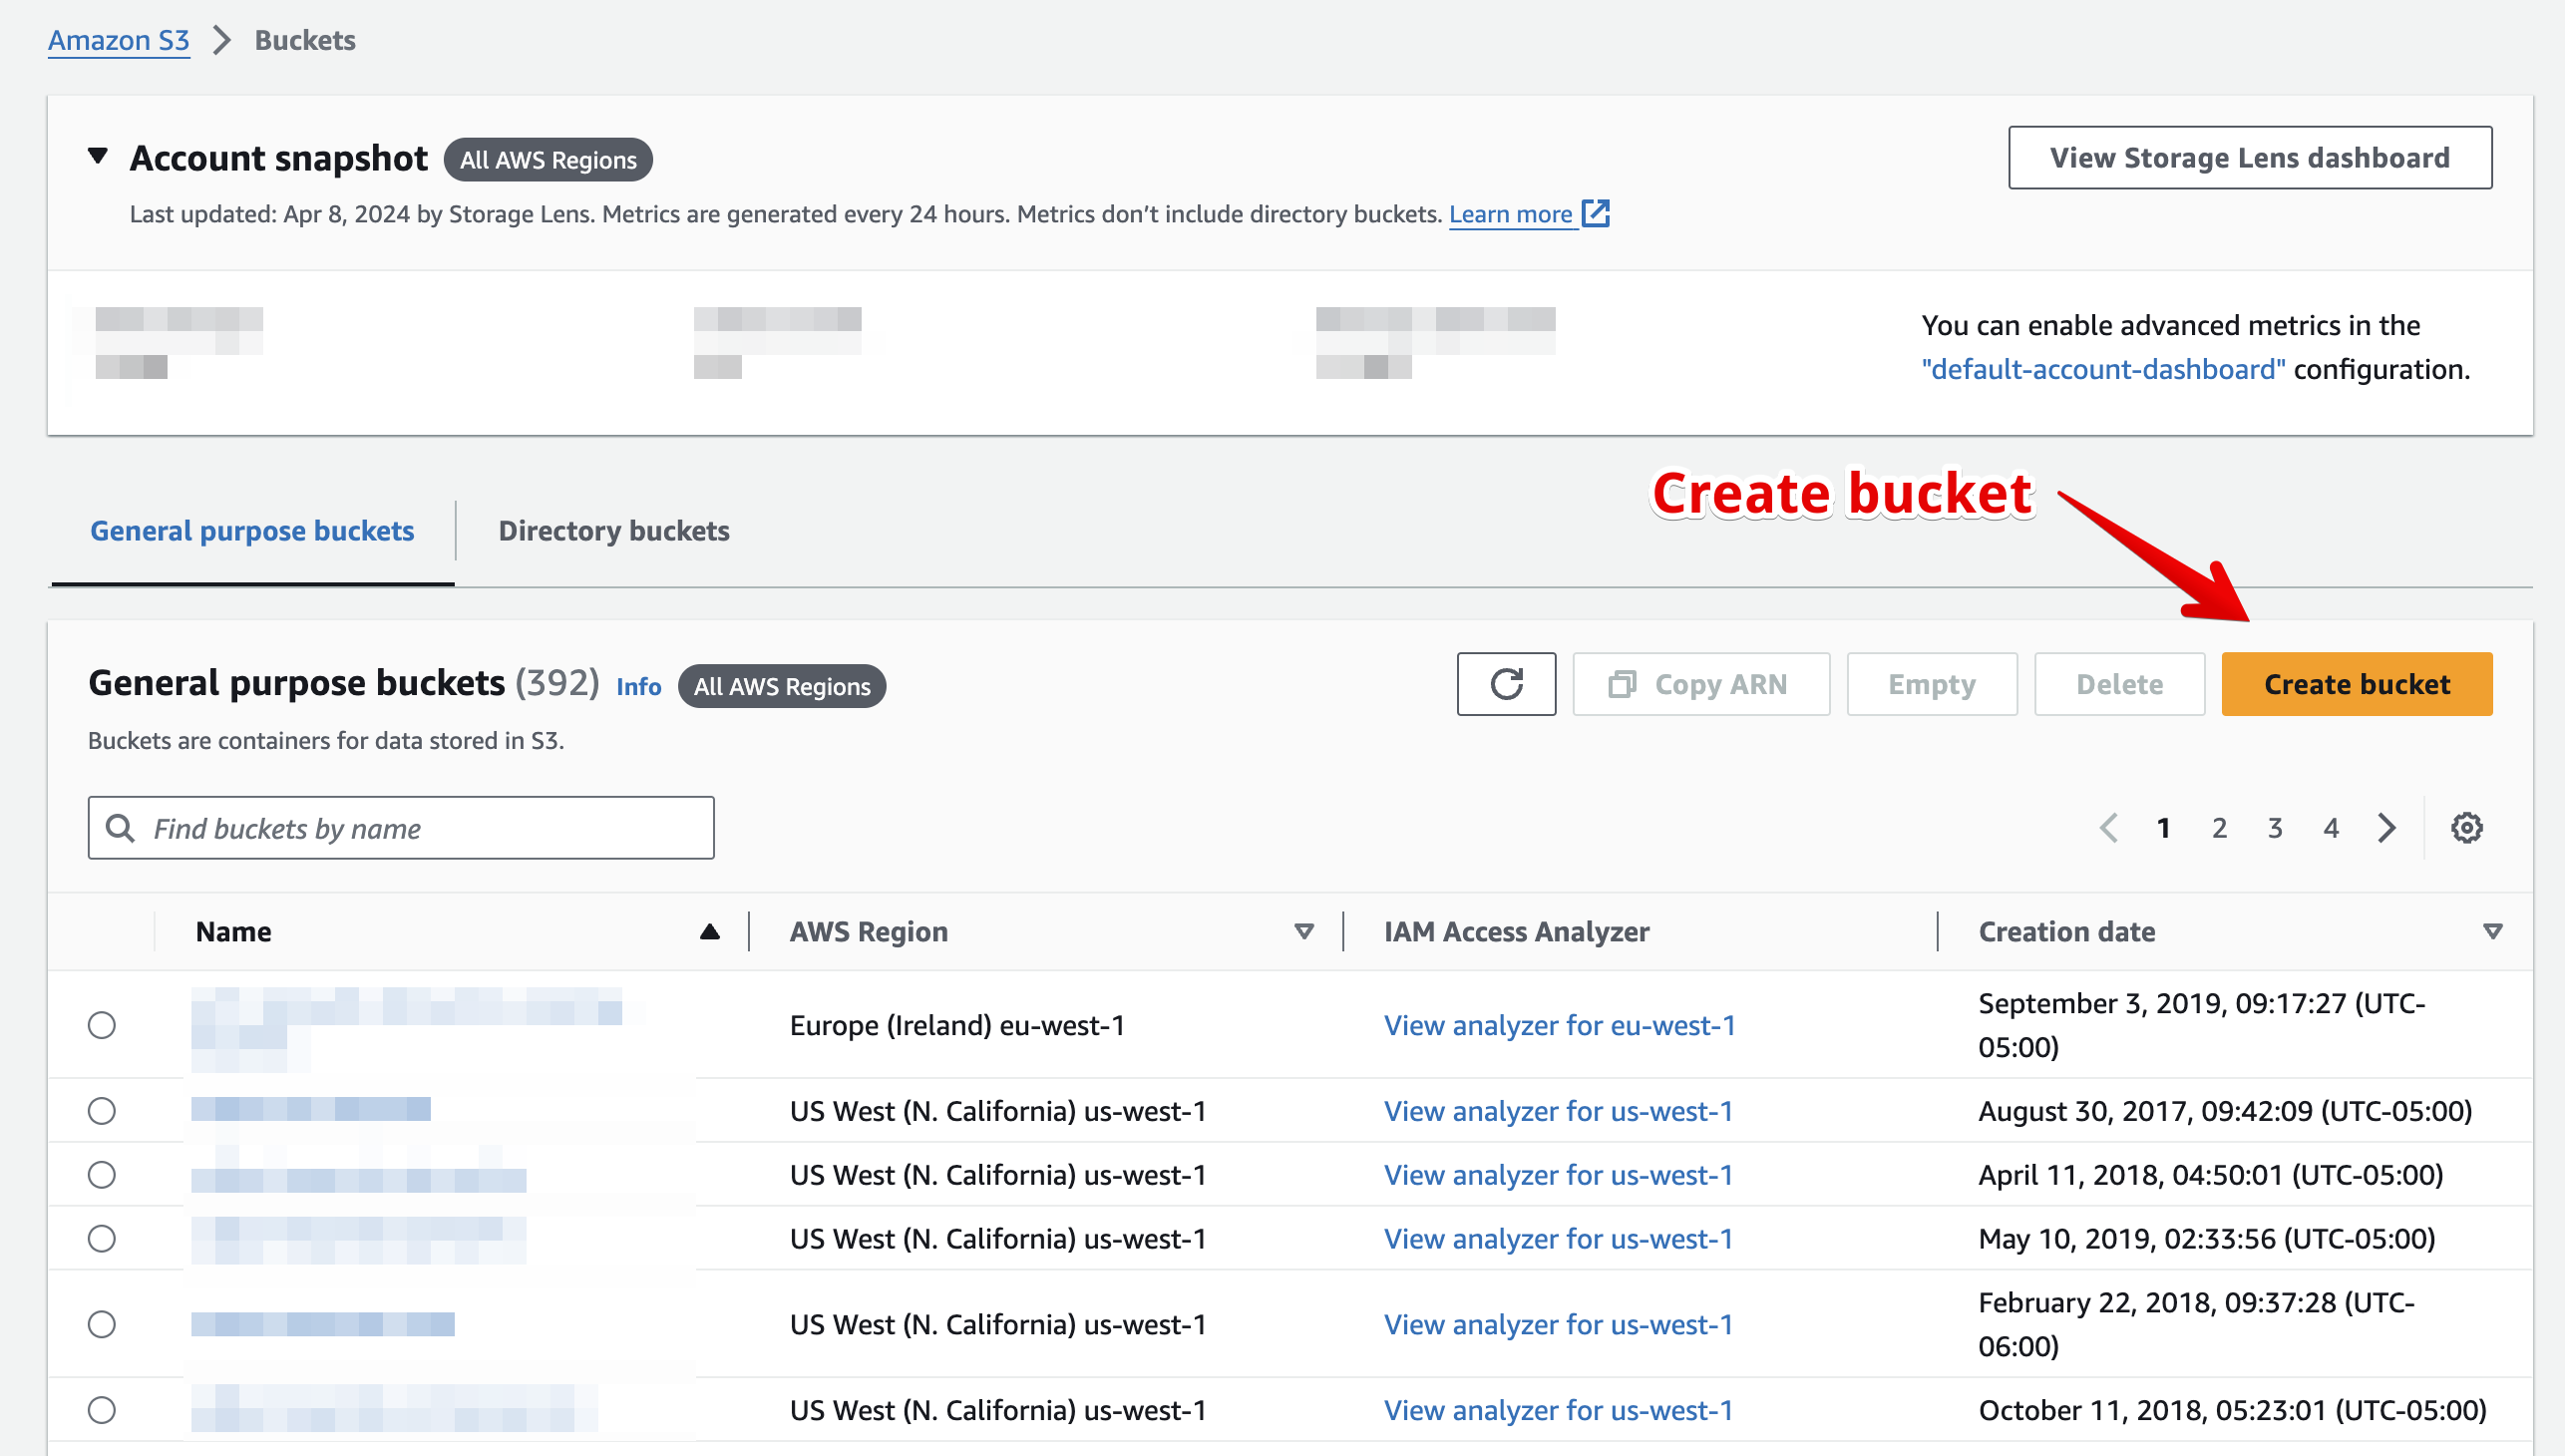
Go to the S3 home page, and click "Create bucket":
-
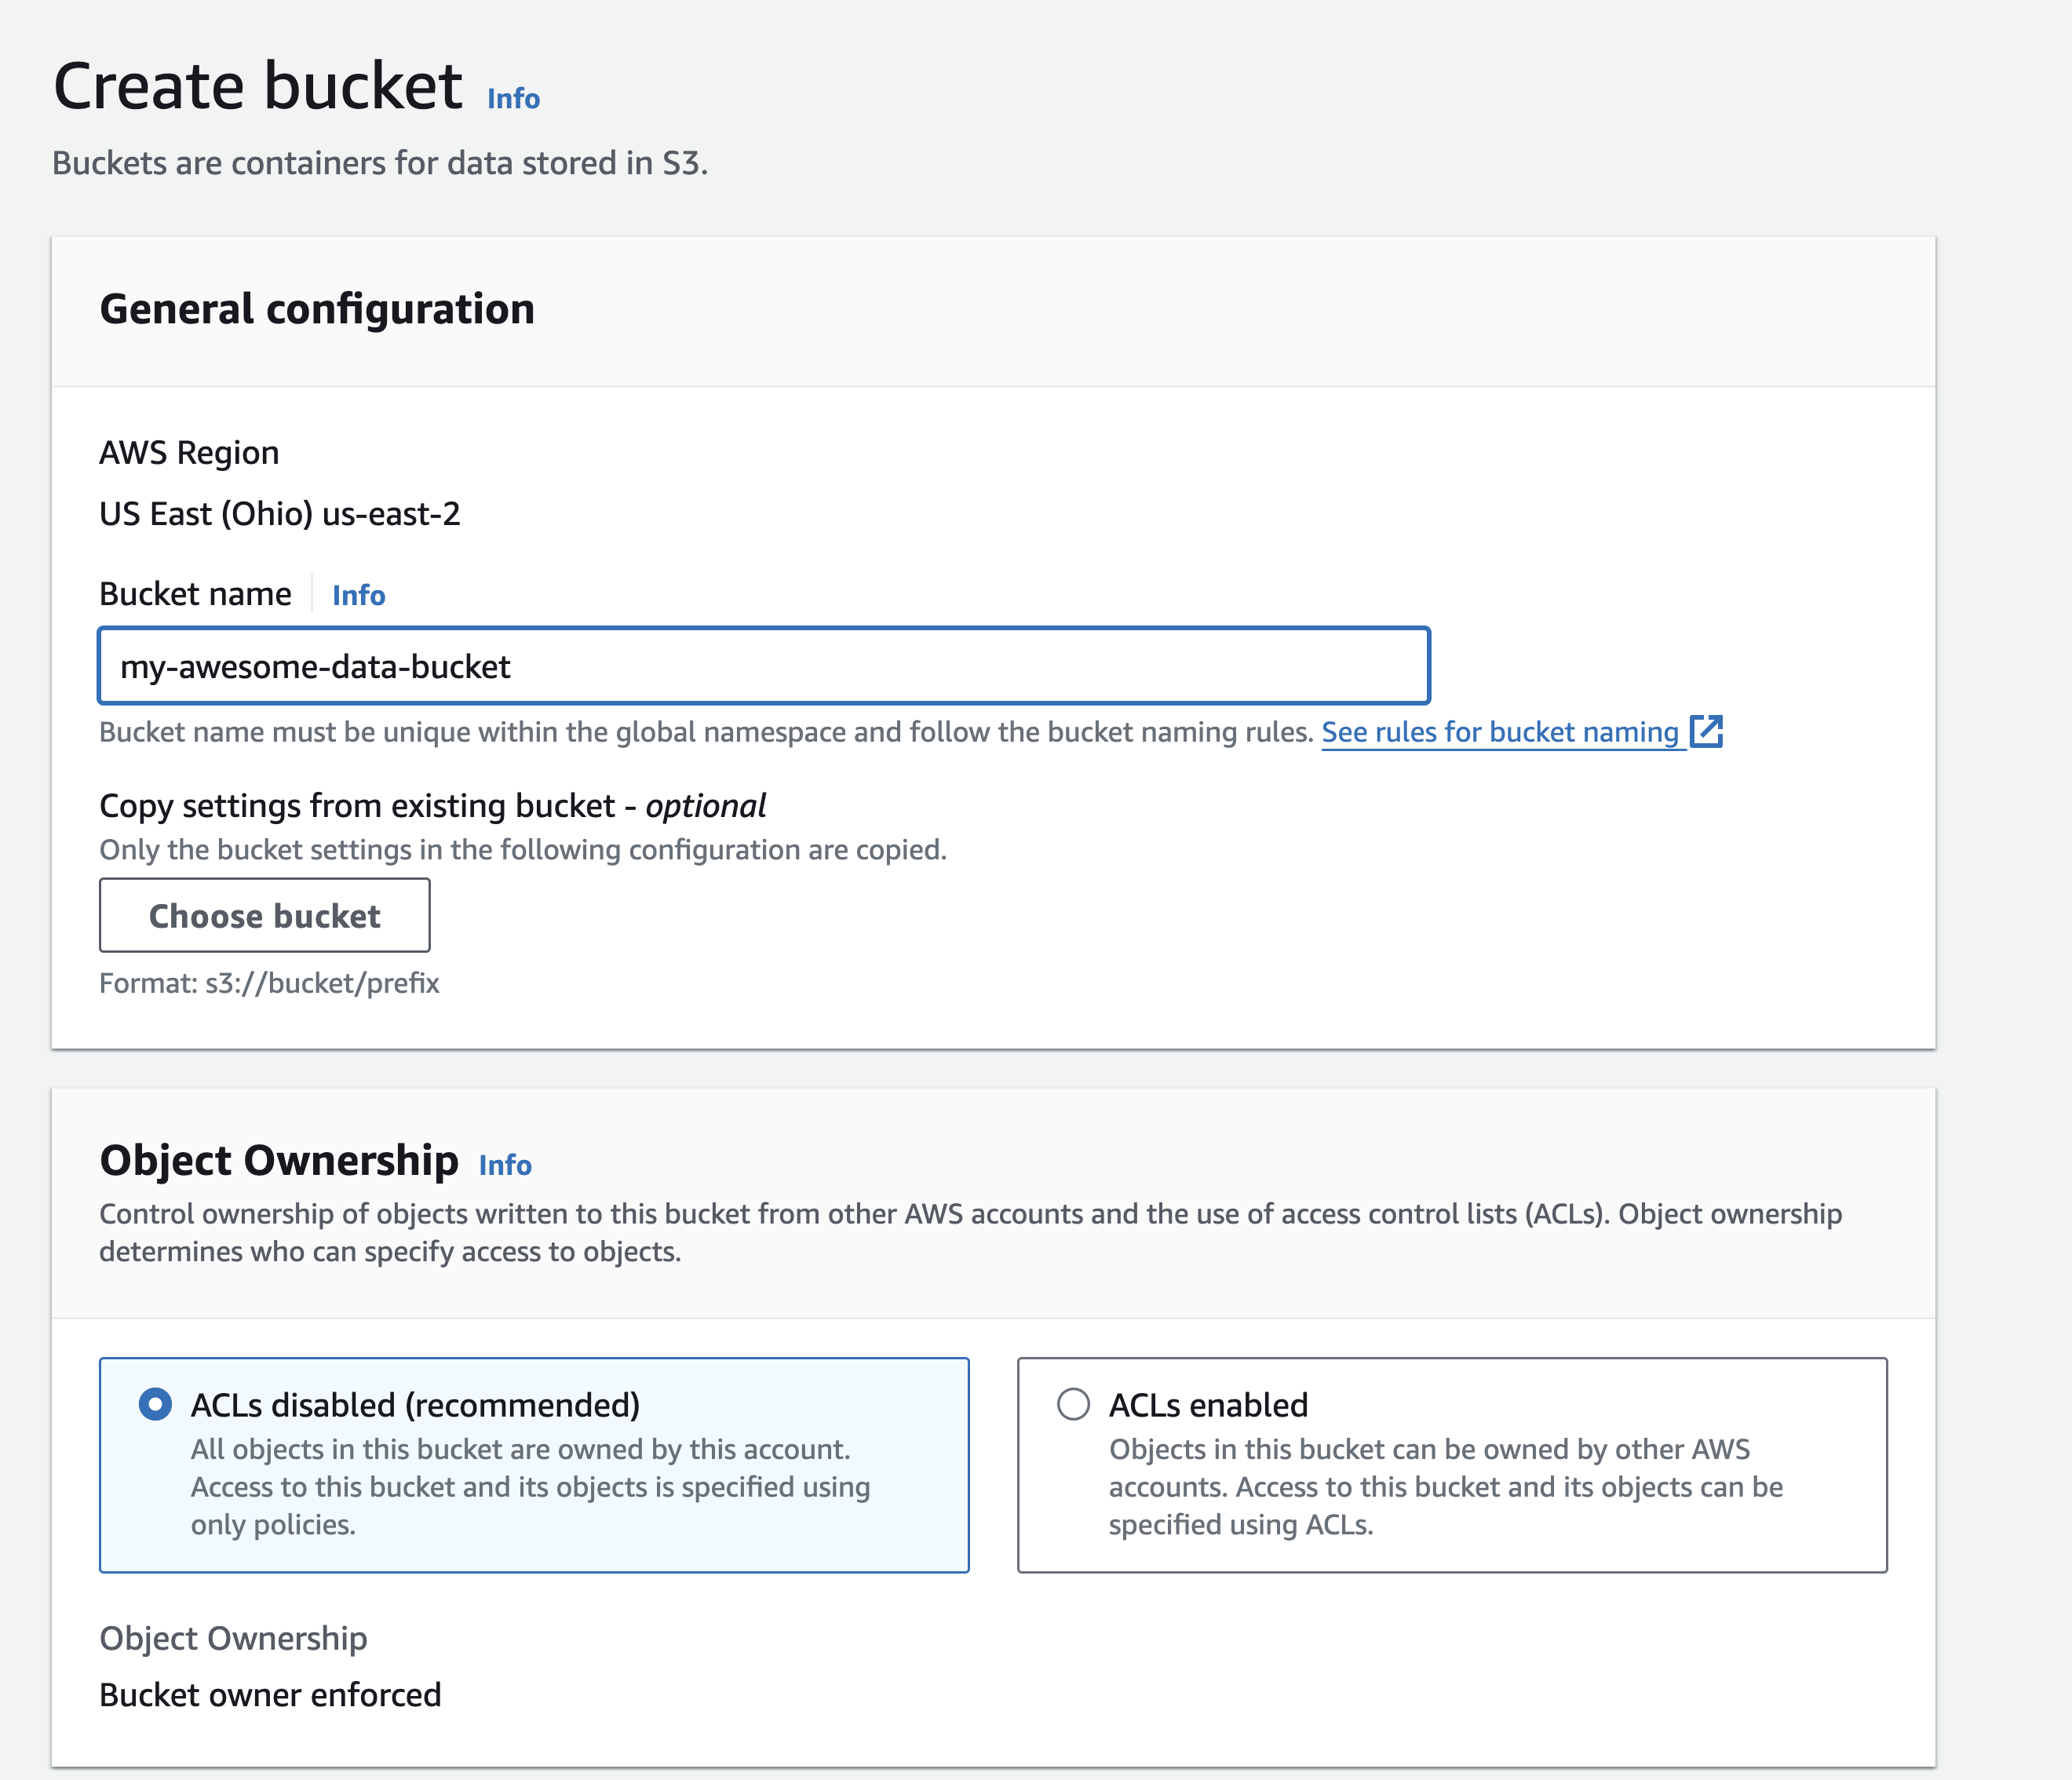
Select a name for your bucket and keep ACLs disabled
-
You can use the default values for the rest of the settings, or change them to your liking.
Create a policy that grants access to the bucket
-
In your AWS Console, go to IAM. In the menu on the left, click Policies.
-
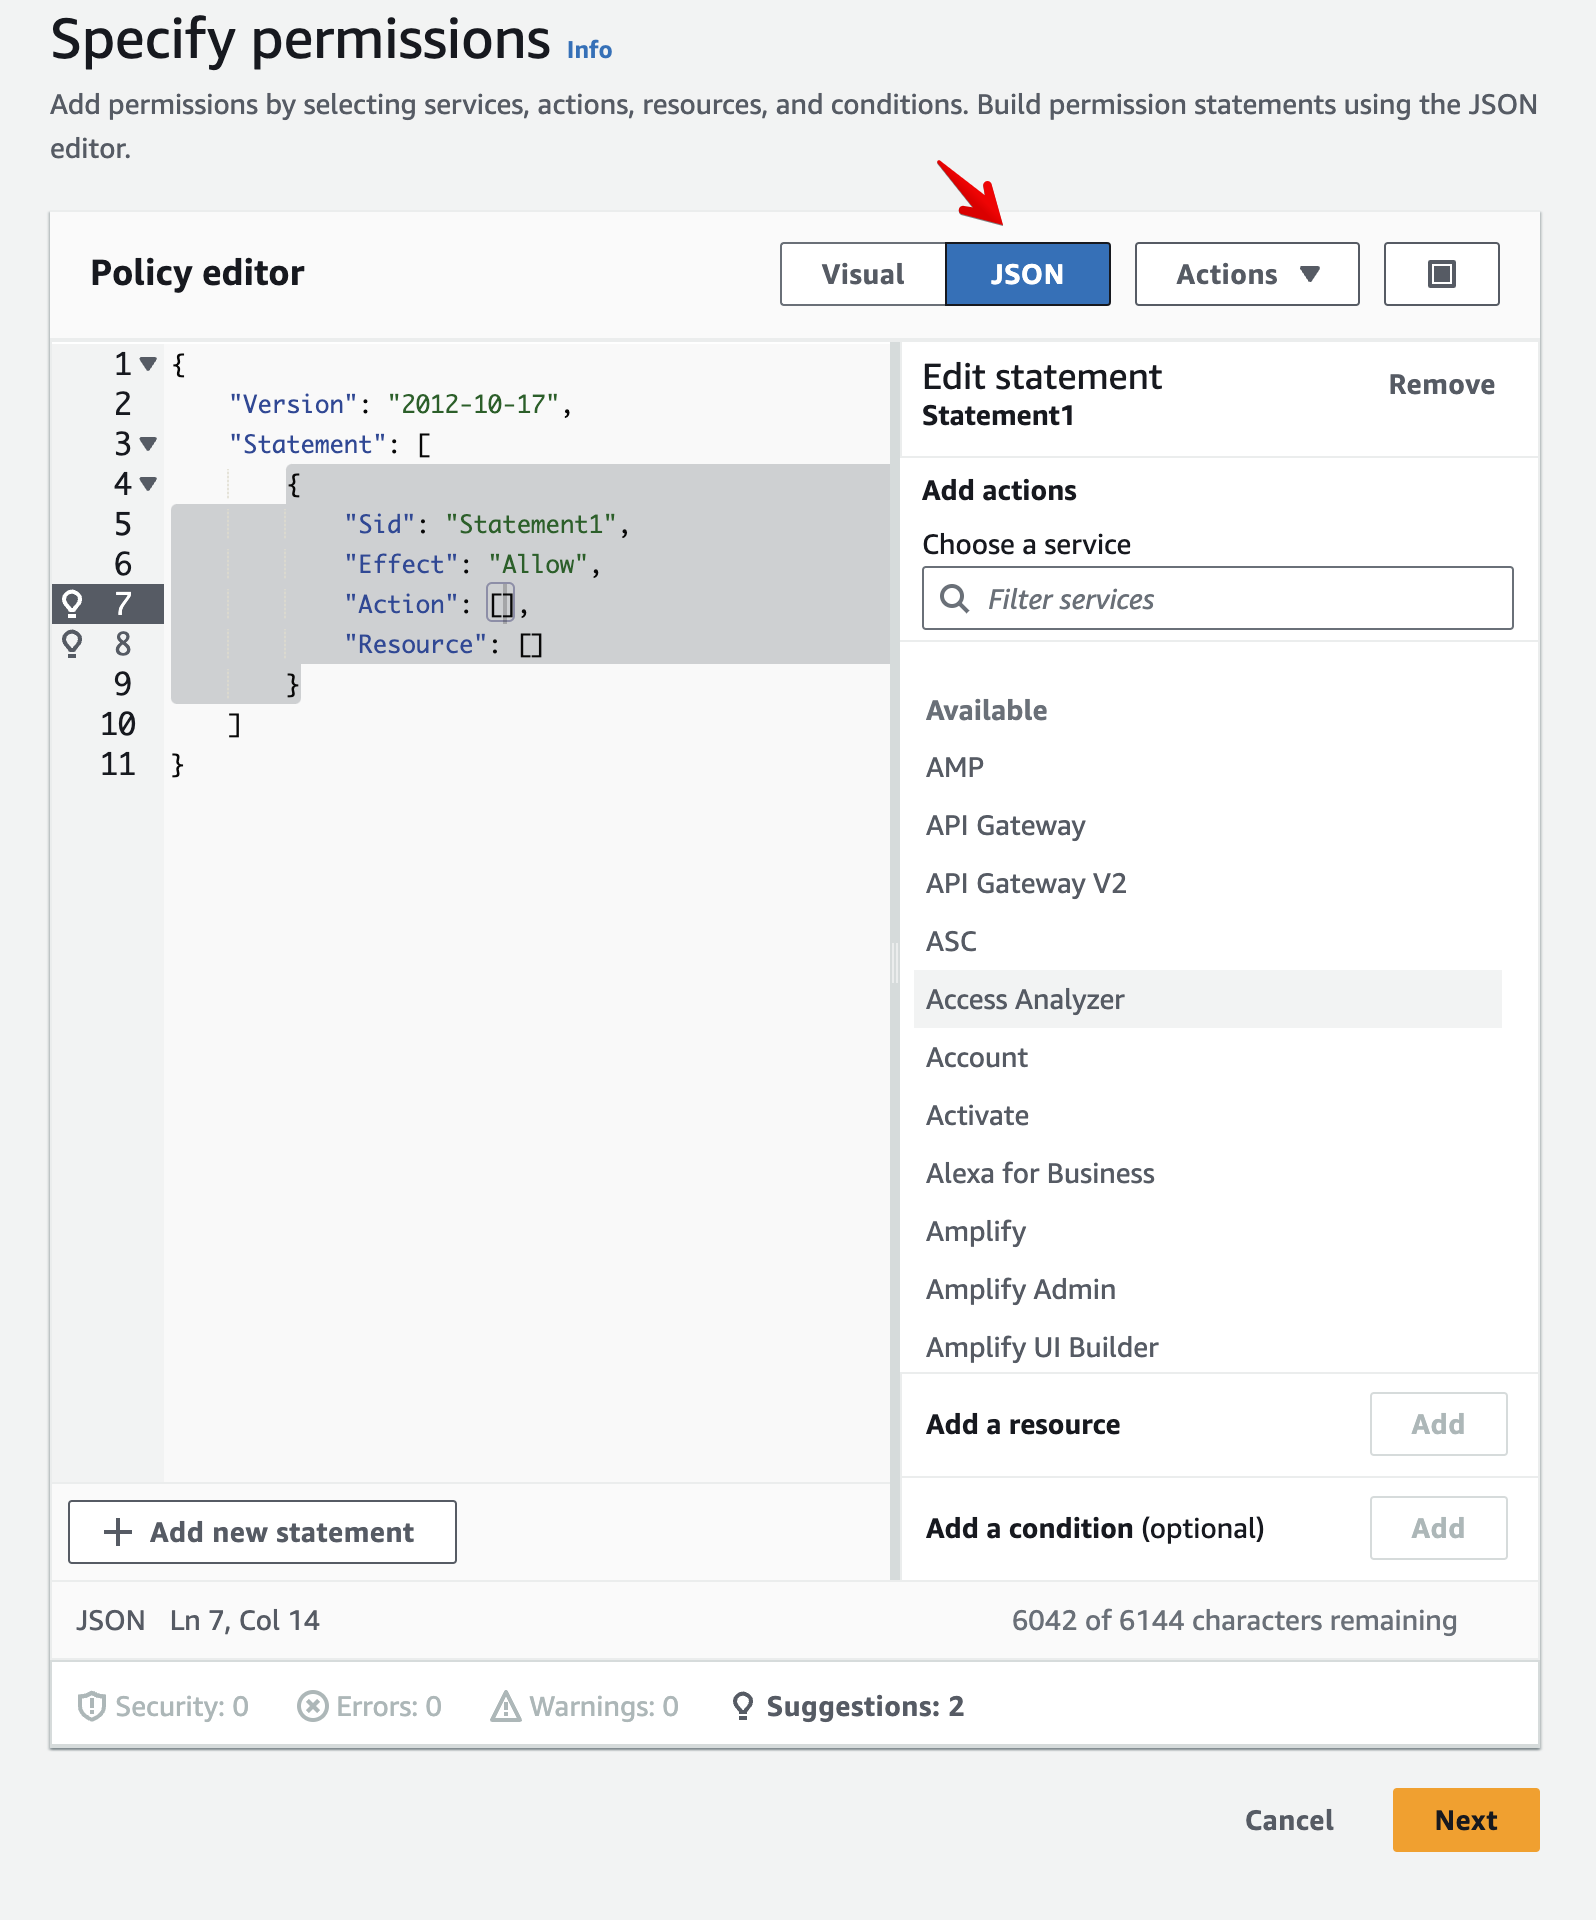
Click Create Policy and click the JSON tab.
-
Copy the following policy (replace YOUR_S3_BUCKET_NAME with the real bucket name):
{
    "Version": "2012-10-17",
    "Id": "",
    "Statement": [
        {
            "Sid": "ExtractBucketAccess",
            "Effect": "Allow",
            "Action":
            [
                "s3:GetObject",
                "s3:PutObject",
                "s3:ListBucket",
                "s3:GetBucketLocation",
                "s3:DeleteObject"
            ],
            "Resource":
            [
                "arn:aws:s3:::YOUR_S3_BUCKET_NAME",
                "arn:aws:s3:::YOUR_S3_BUCKET_NAME/*"
            ]
        }
    ]
}
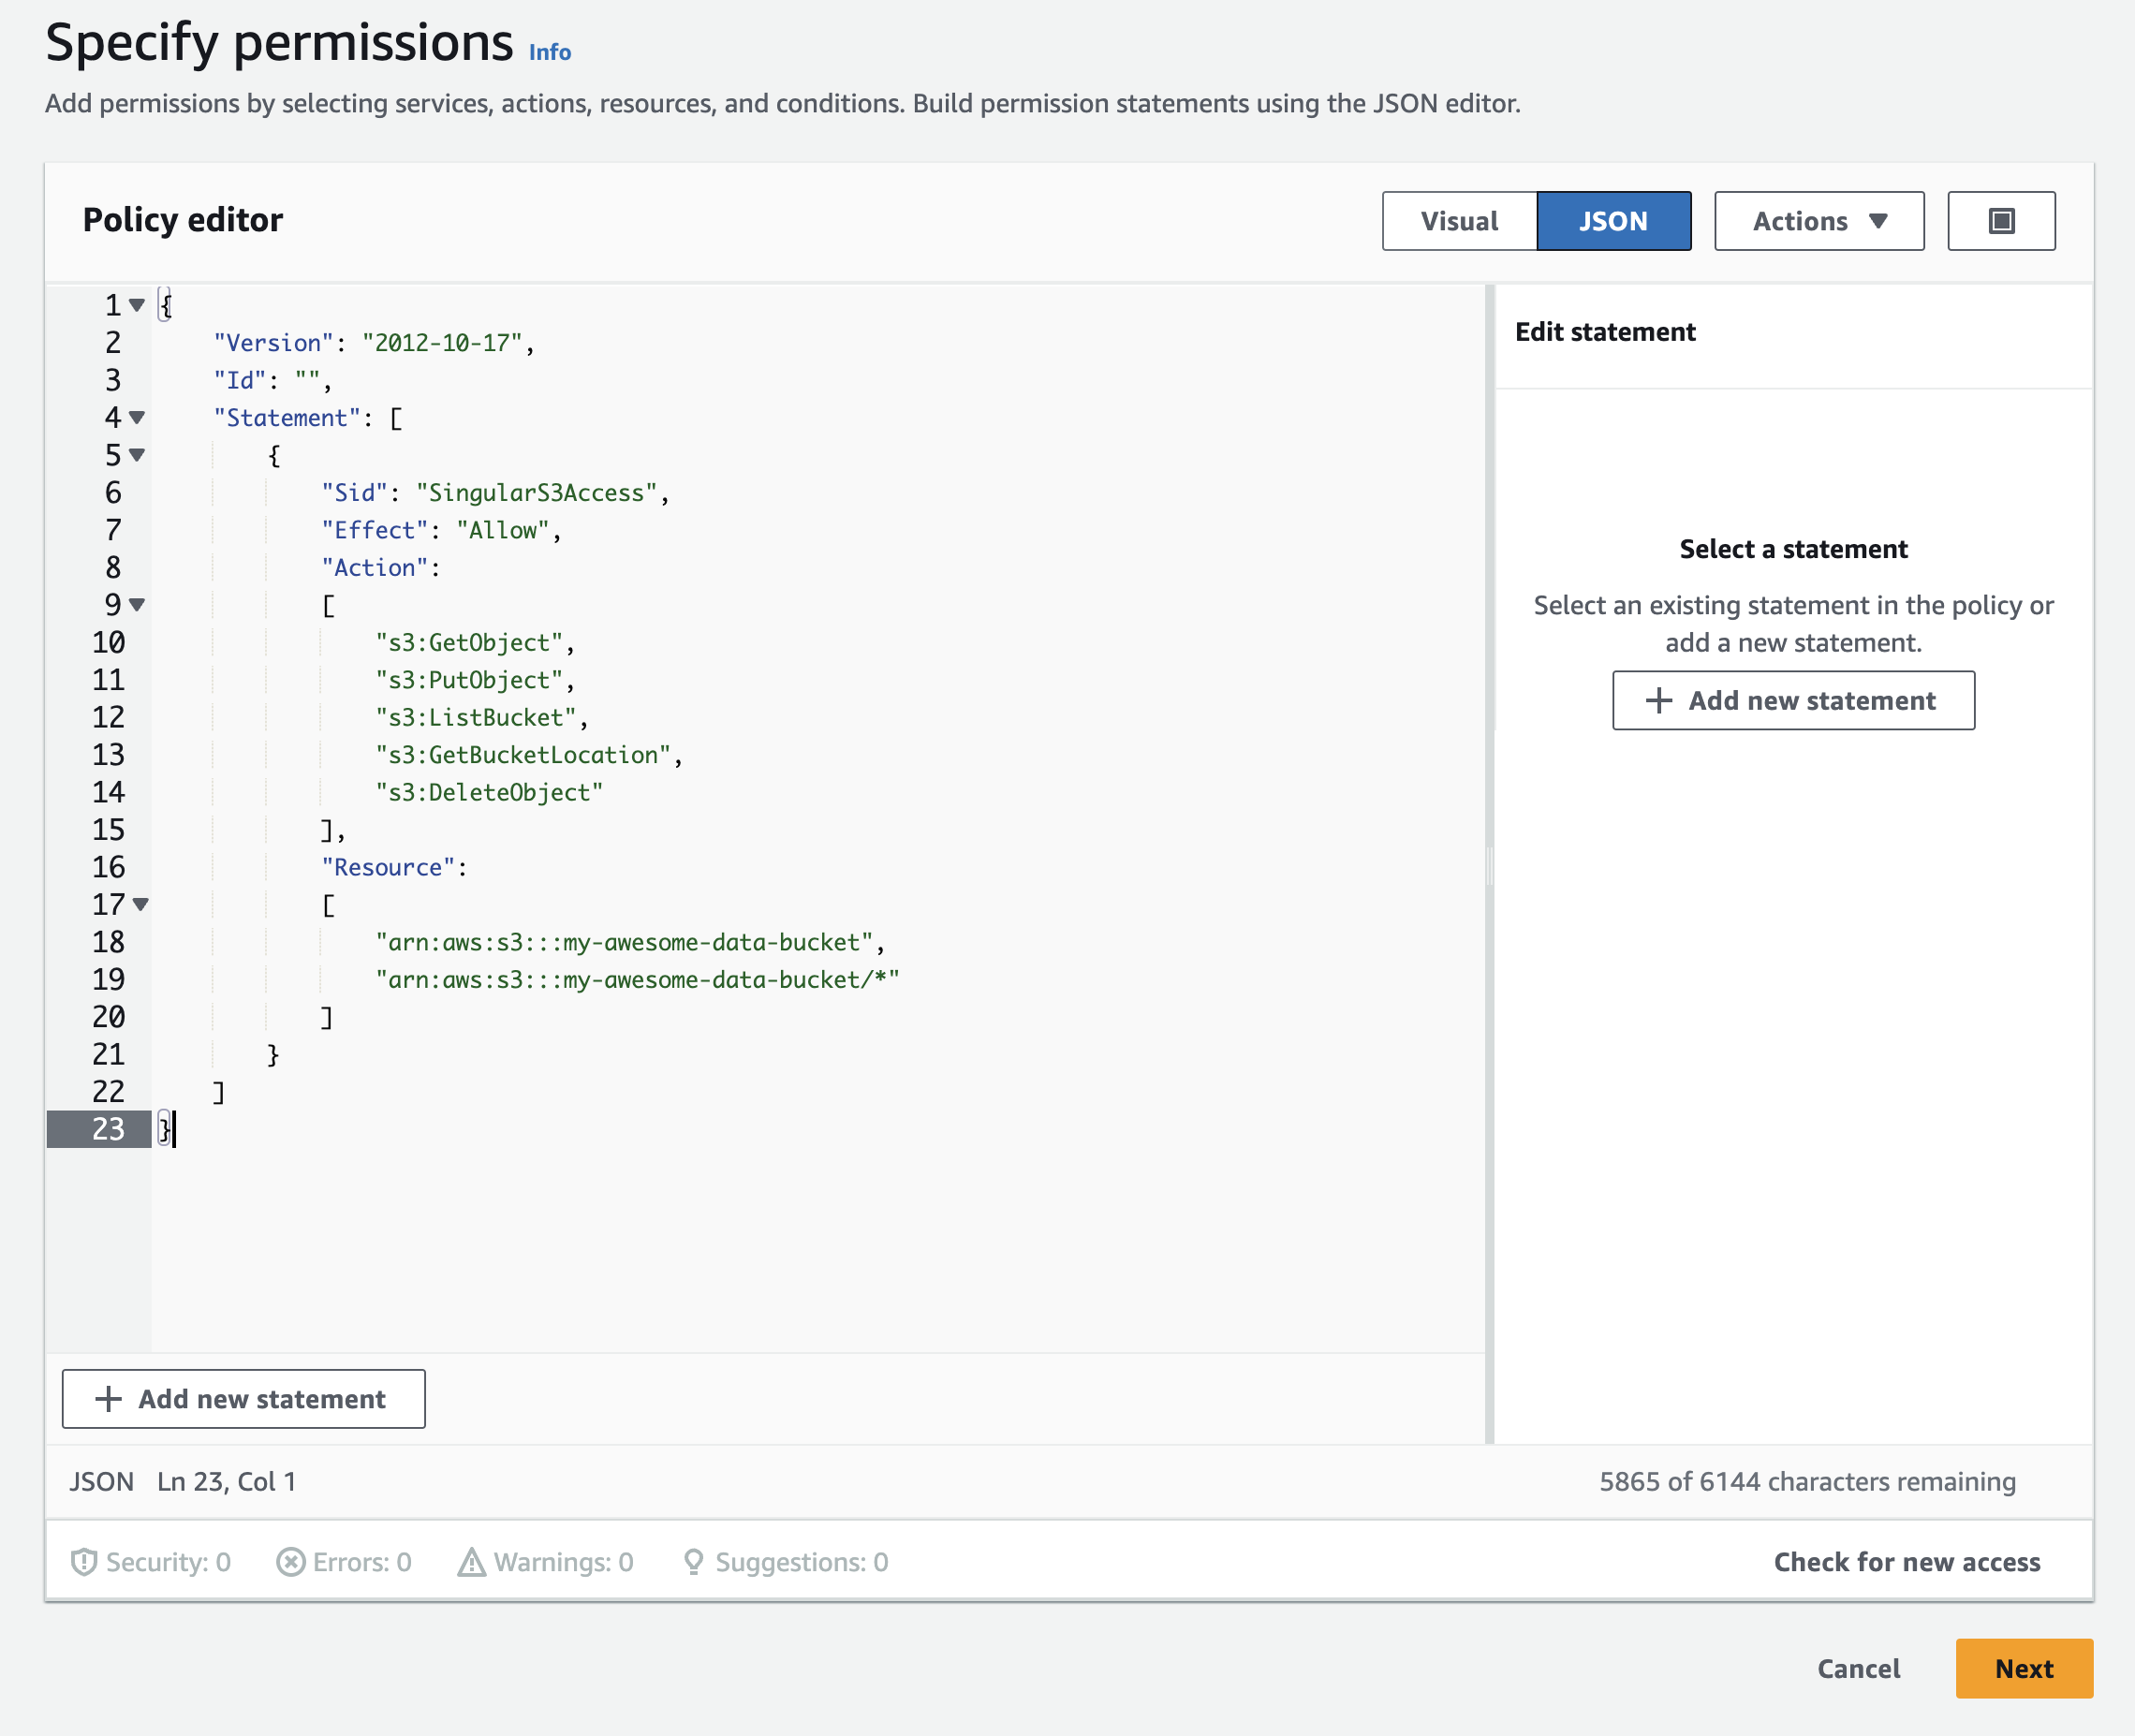
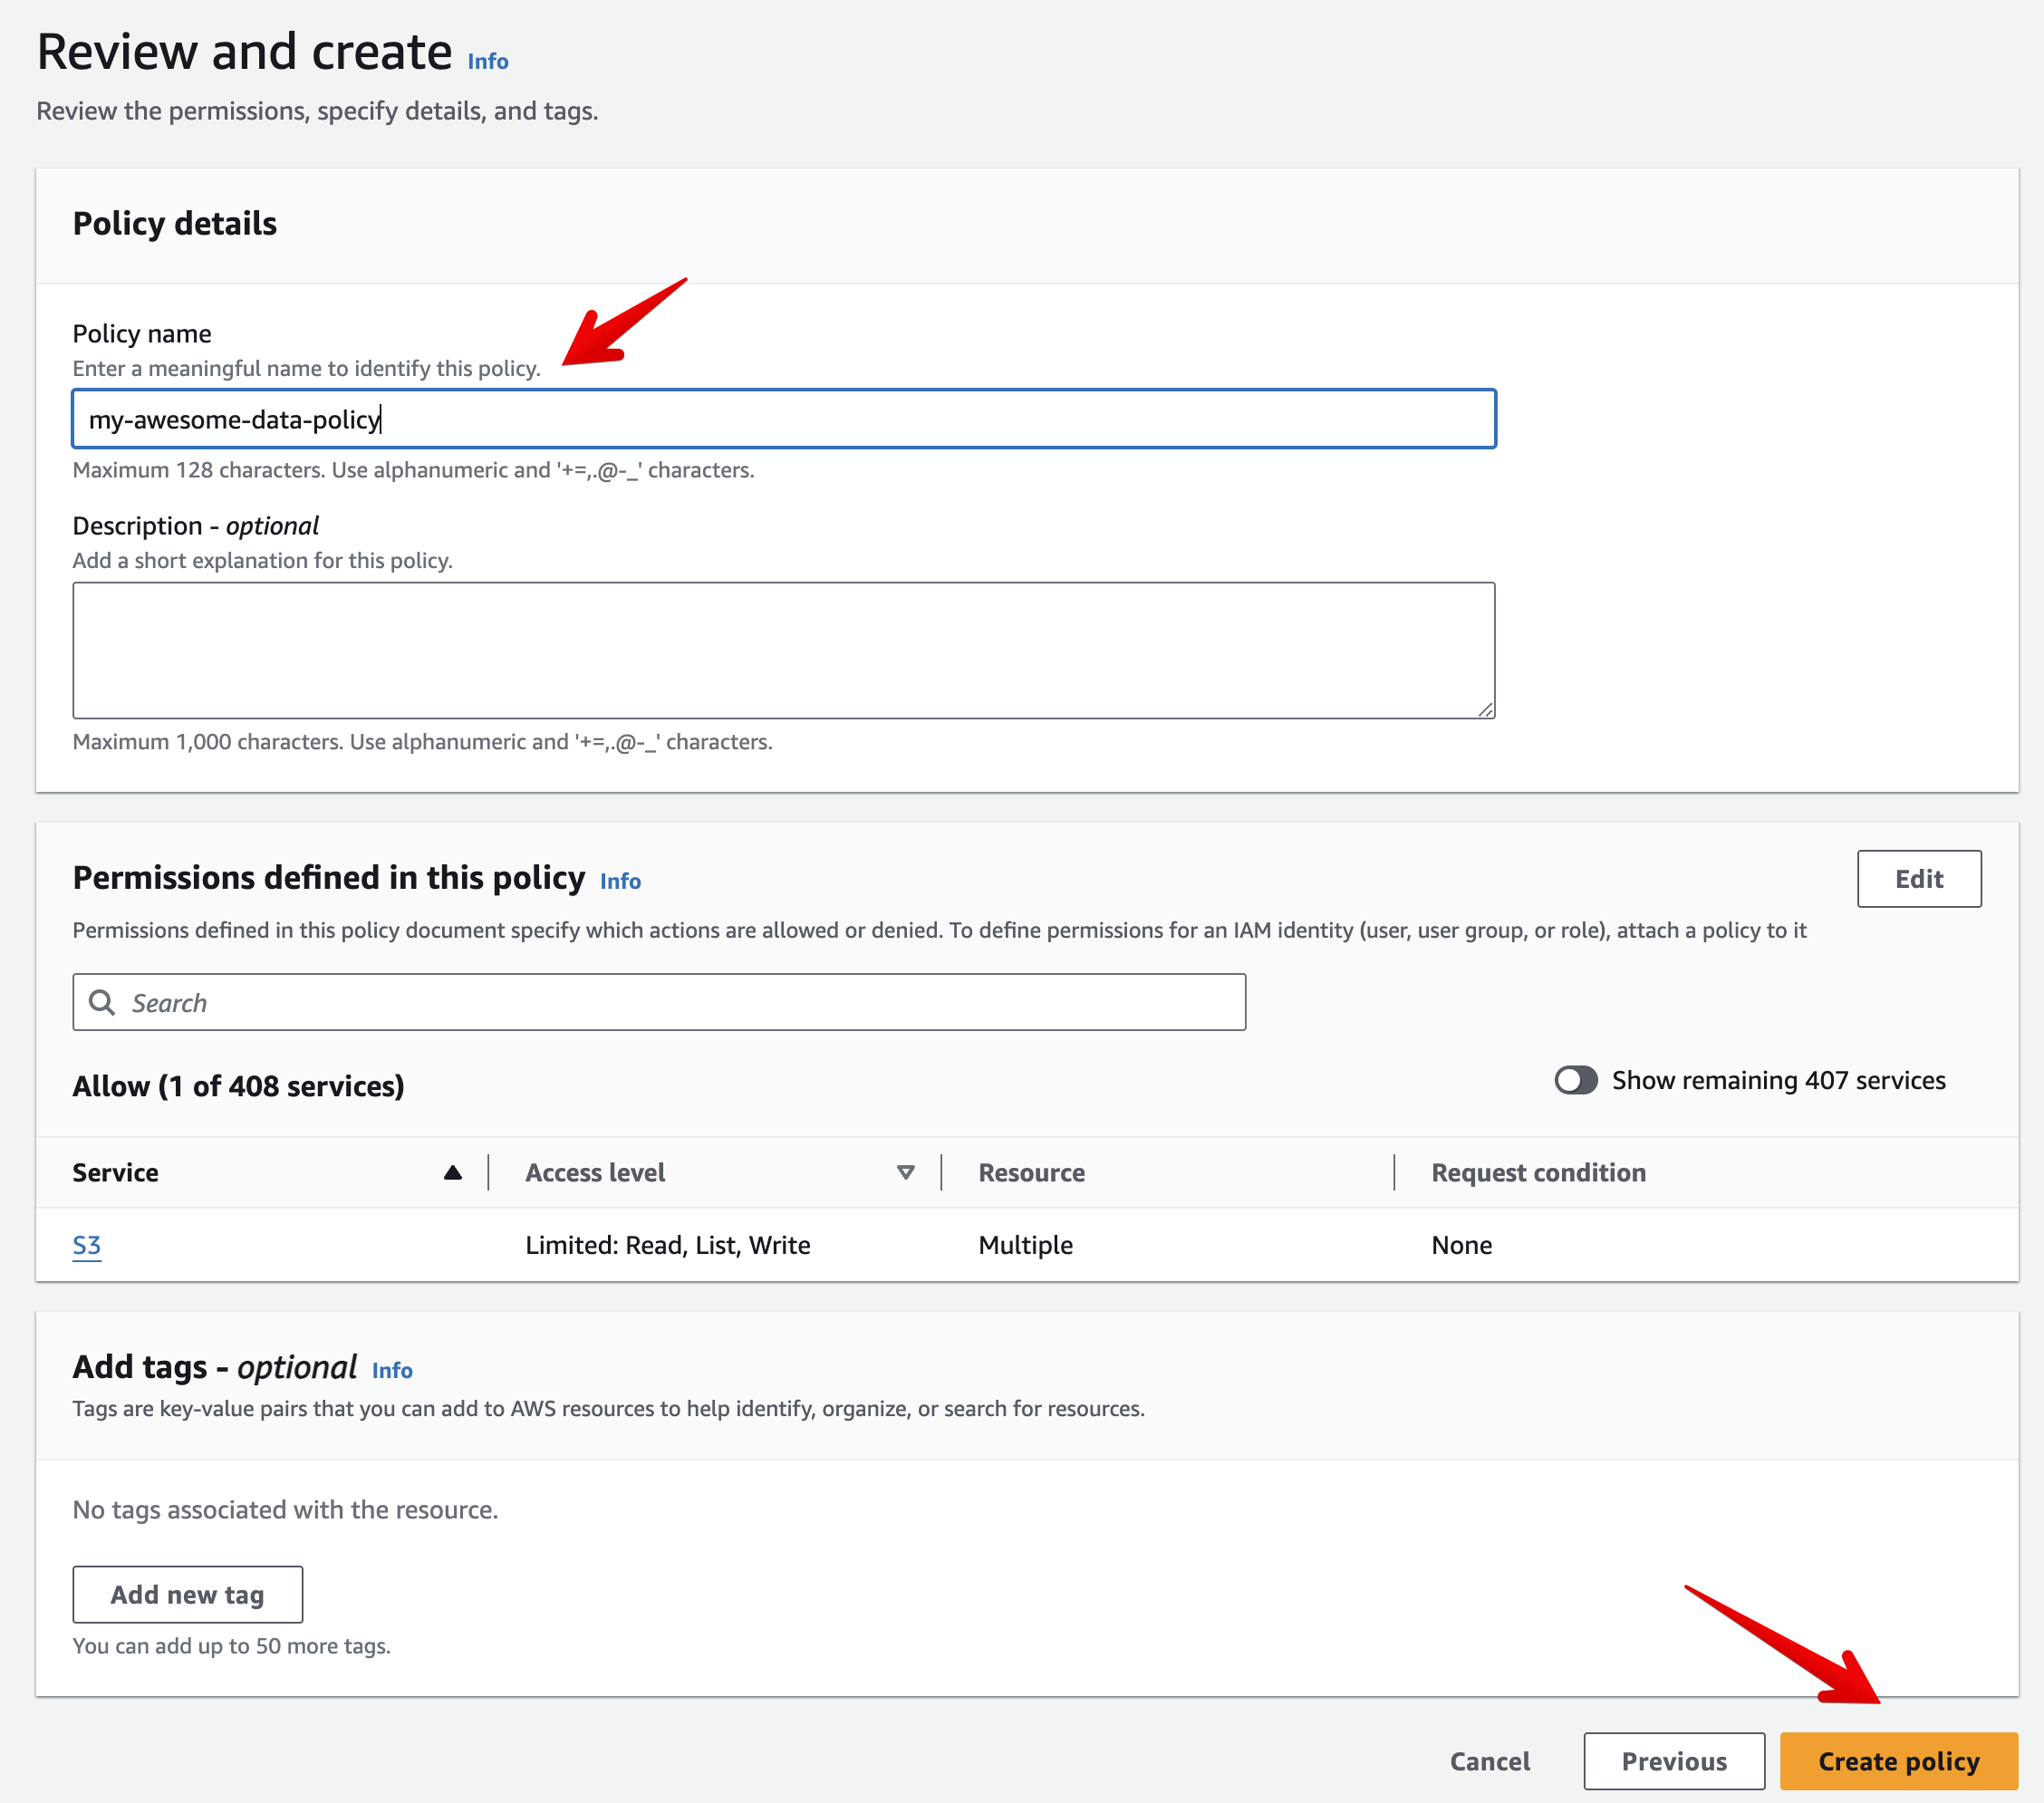
- Click Next, set a Policy name and click Create policy
Step 3 - Choose an authentication mode
There are two methods of authentication:
- The "Cross Account Role" (Step 4) method is prefered and recommended by AWS. It works by us "assuming" a Role you create in your AWS account.
- The "Access Key" (Step 5) method works by creating an IAM User with access to the AWS resource, and granting us the Access Key ID and Secret Access Key parameters.
Step 4 - Cross Account Role (Auth Method 1 - Preferred)
-
In the setup tab of your connector, select the "Cross Accont Role" method, and copy the External ID value
-
In your AWS Console, go to IAM. In the menu on the left, click Roles.
-
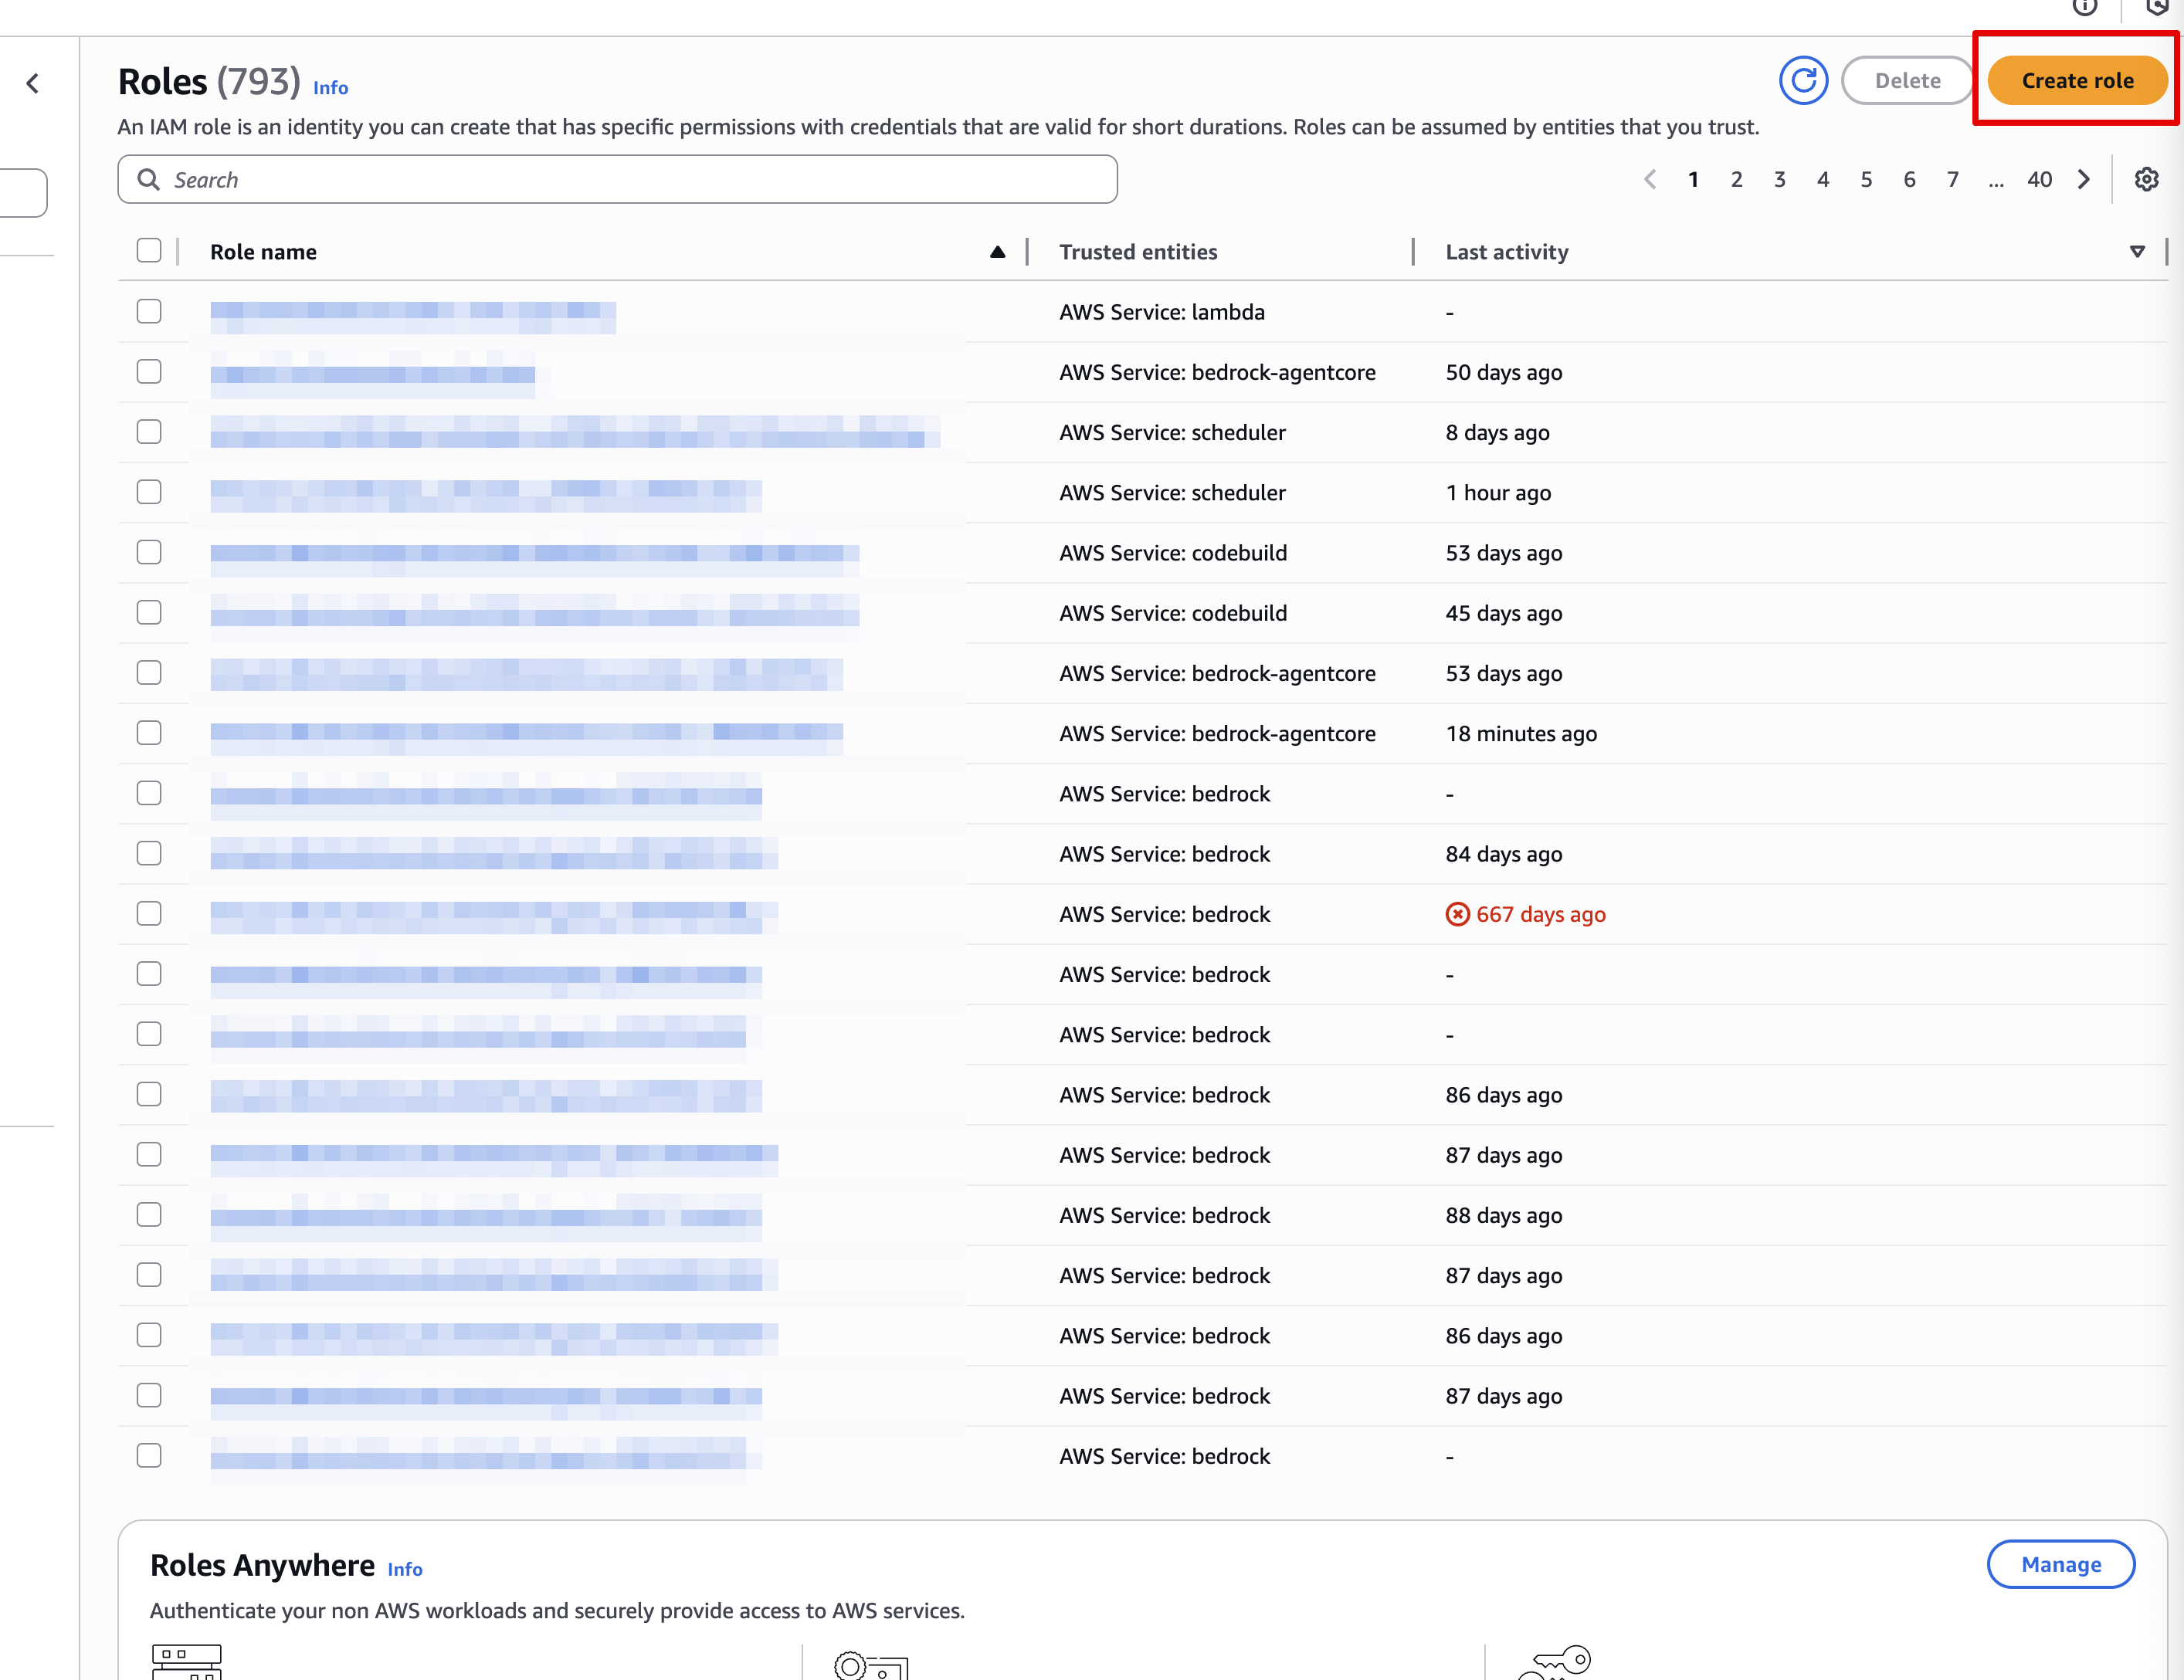
Click Create role
-
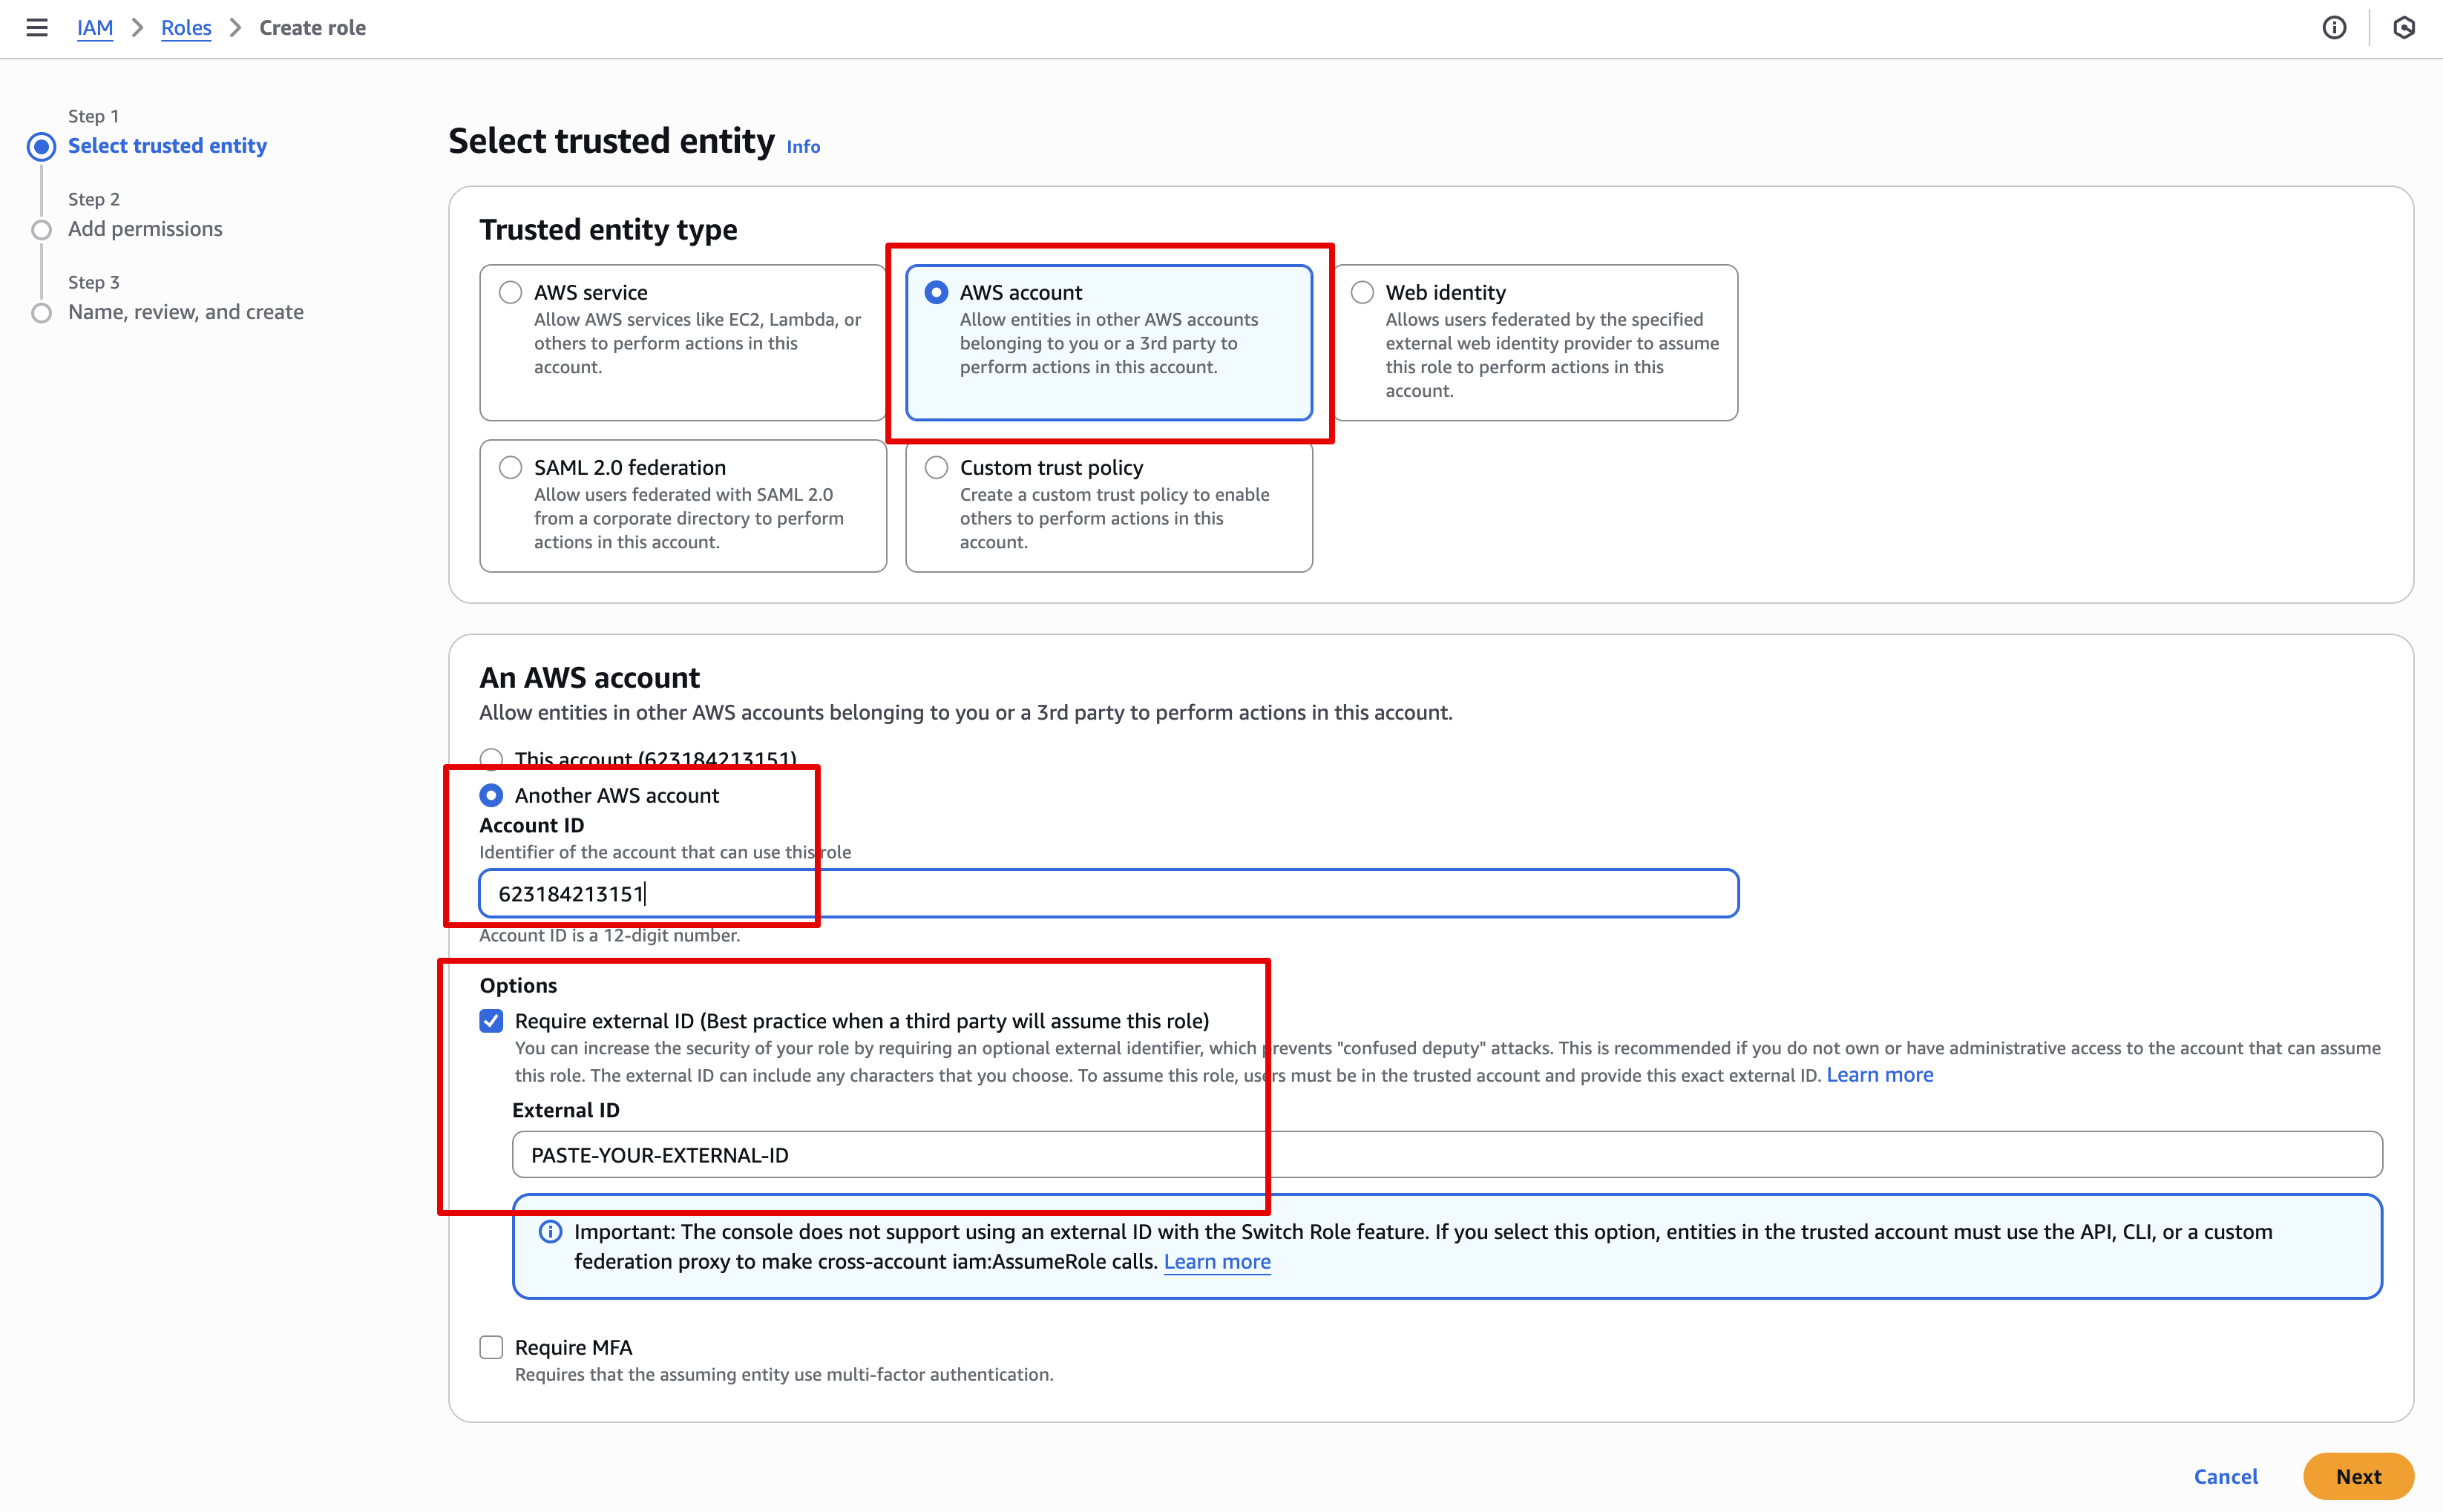
Choose AWS account
-
Select the "Another AWS account" option, and type in this Account ID:
623184213151 -
In Options - enable Require external ID and paste the External ID provided to you in the Setup tab of the connector
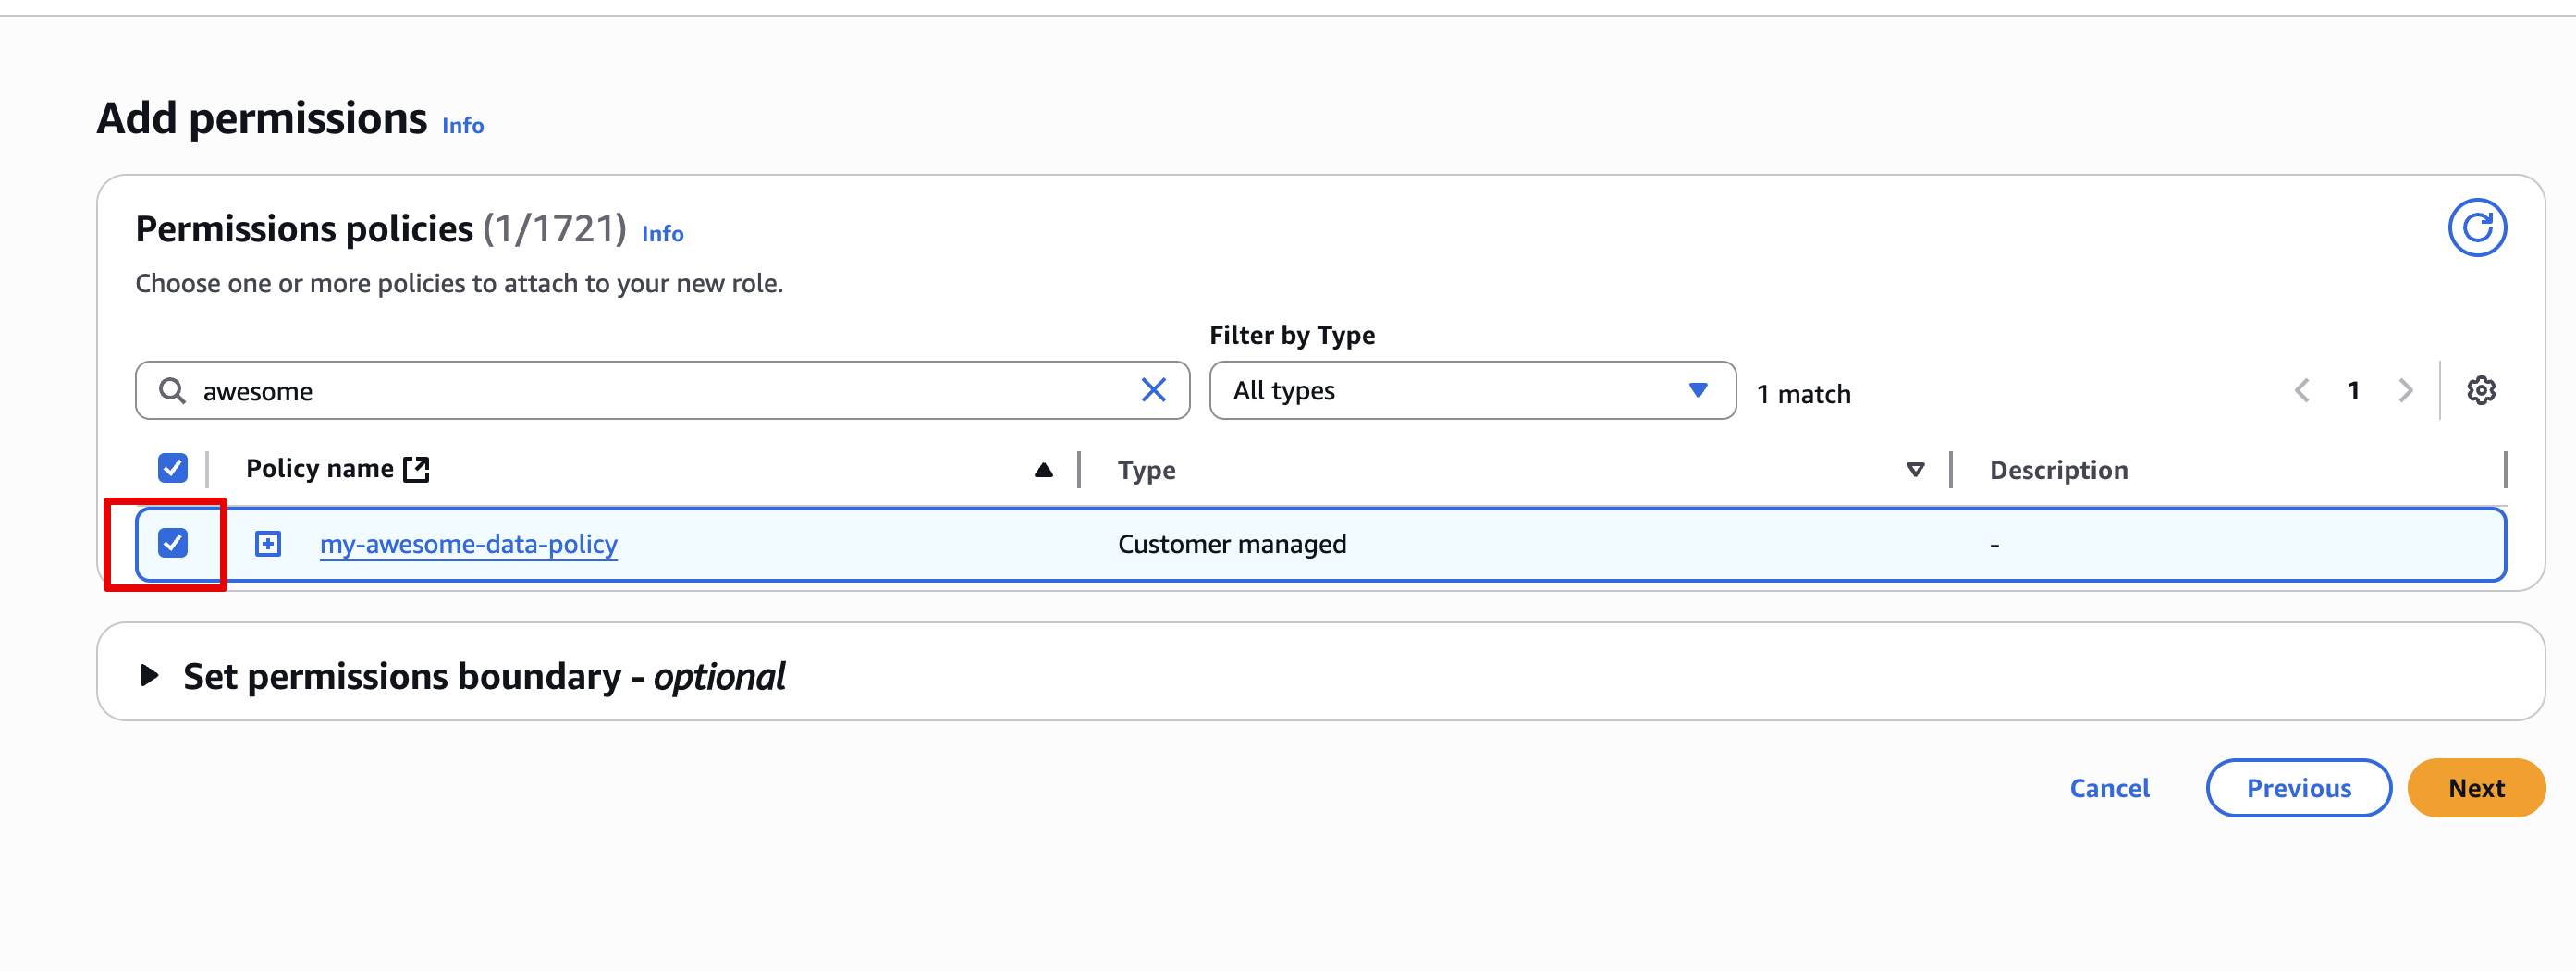
- Find the permission policy you created in Step 2 and select it
- Give the role a meaningful name and click Create role. For reference your
Trust policyshould look like this:
{
    "Version": "2012-10-17",
    "Statement": [
        {
            "Effect": "Allow",
            "Action": "sts:AssumeRole",
            "Principal": {
                "AWS": "623184213151"
            },
            "Condition": {
                "StringEquals": {
                    "sts:ExternalId": "YOUR-EXTERNAL-ID-HERE"
                }
            }
        }
    ]
}
Step 5 - Access Key (Auth Method 2)
-
In the setup tab of your connector, select the "Access Key" method
-
In your AWS Console, go to IAM. In the menu on the left, click Users.
-
Click Create user, choose a User name and click Next
-
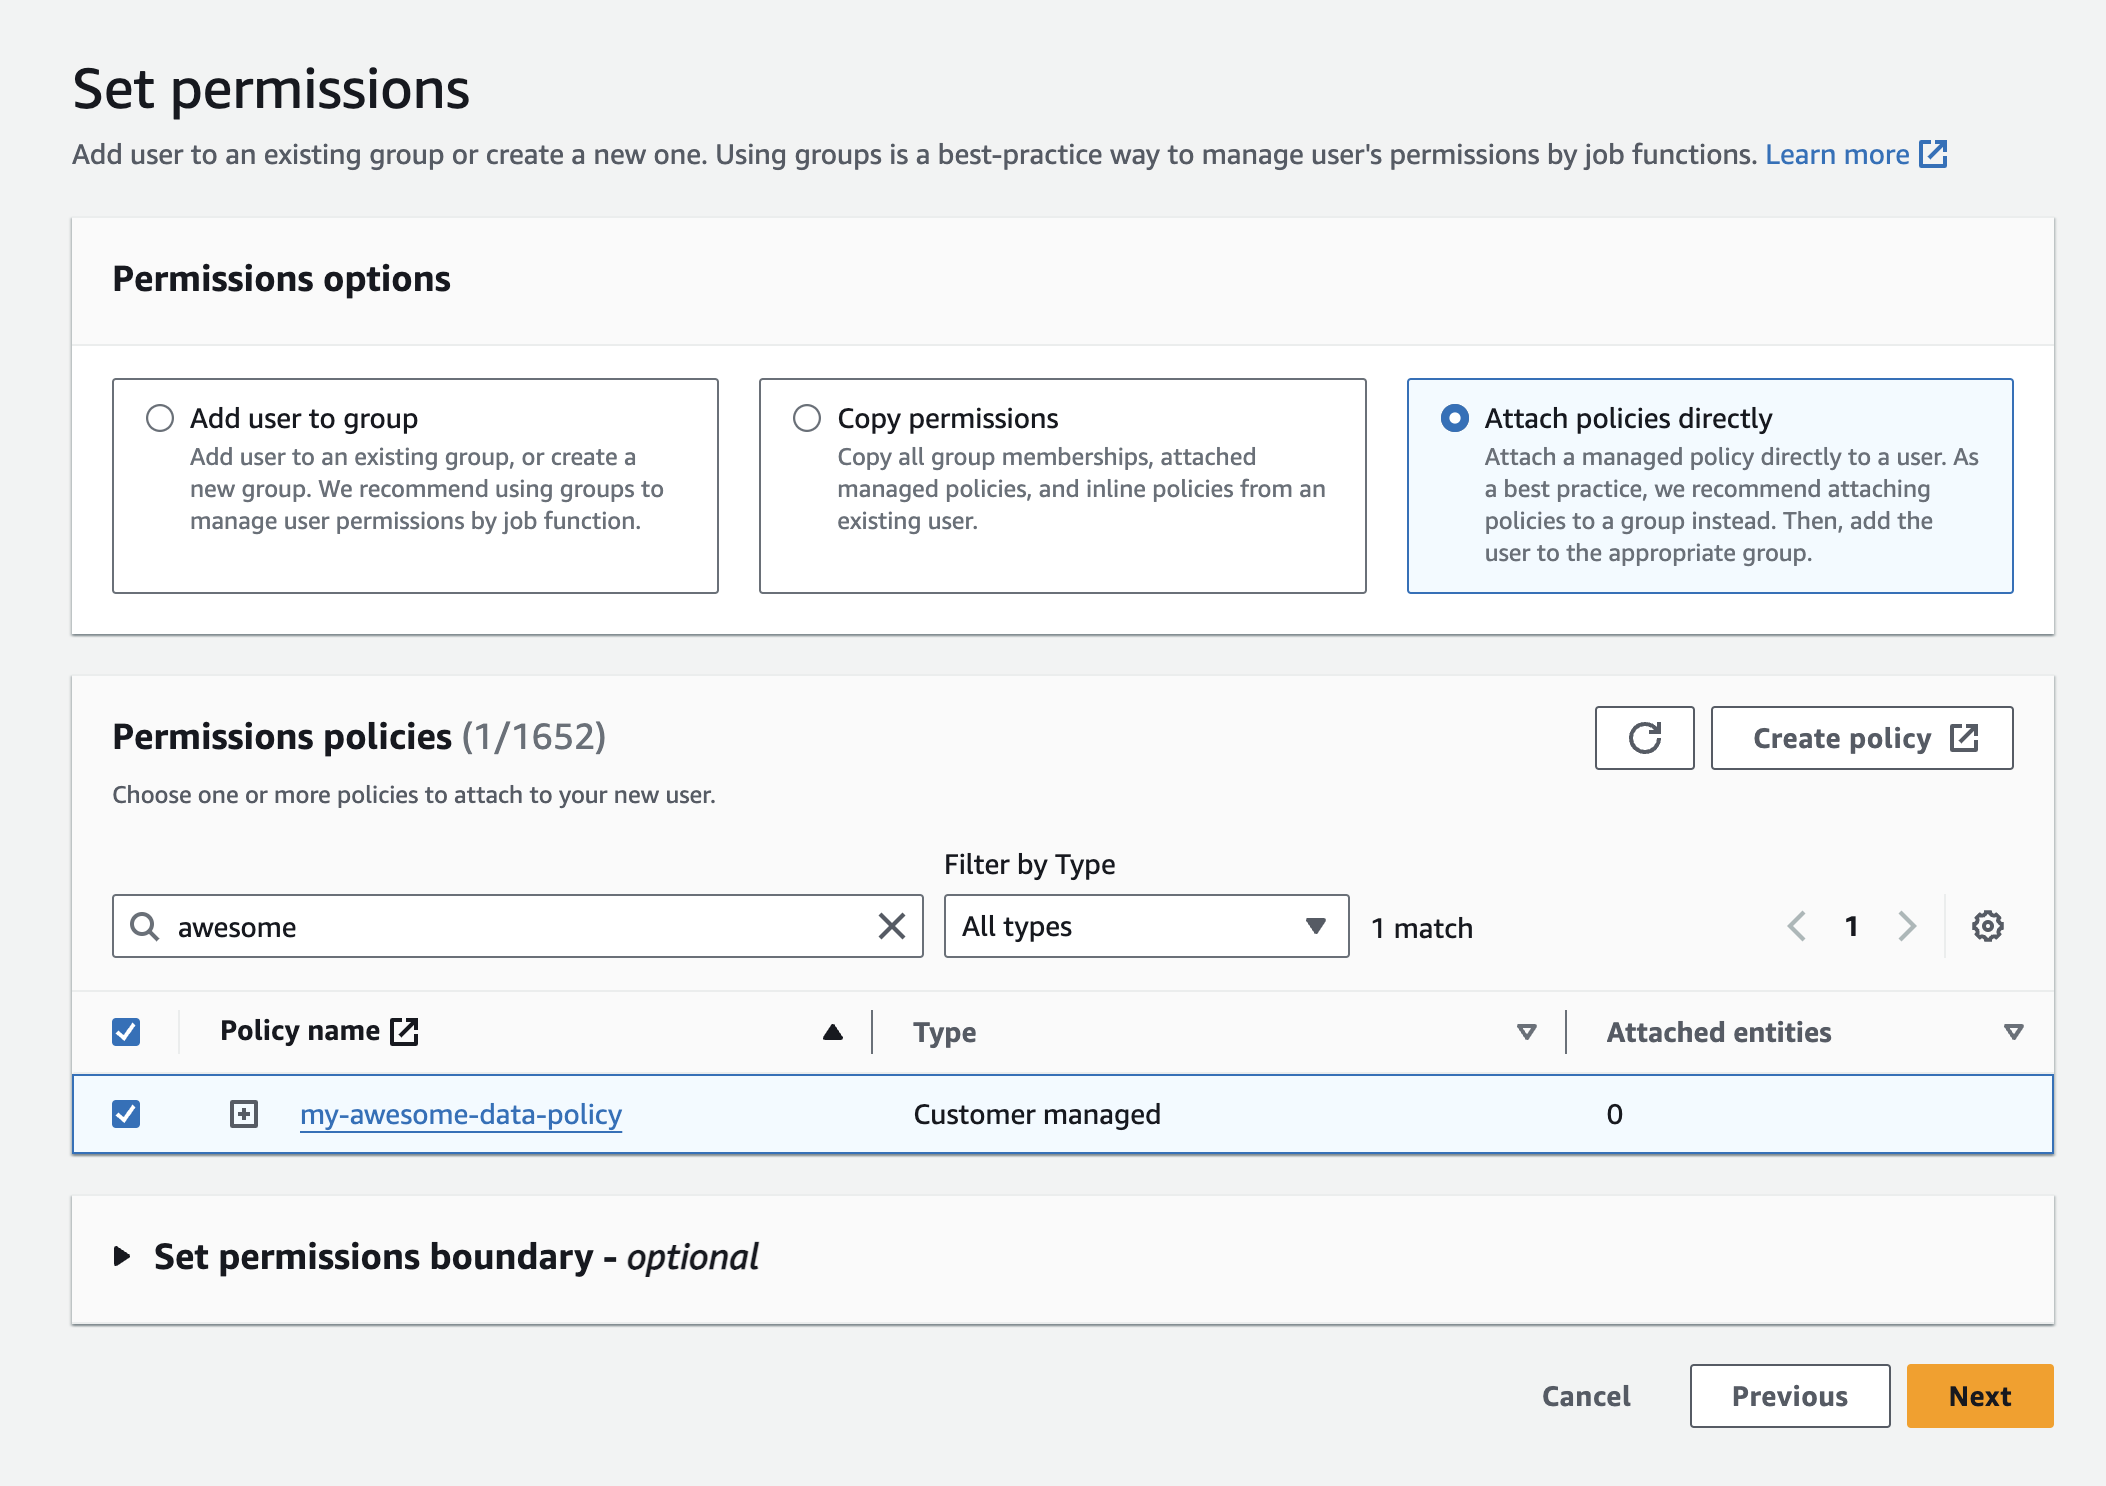
Click Attach policies directly and select the opilcy you just created.
-
Click Next, review all the details and then click Create
-
Find the user you just created, click on it, and go to the Security credentials tab.
-
Click on Create access key. In your use-case you can choose "Third-party service", check the checkbox below and click Next.
-
Select a description, and click Create access key
-
Copy your Access Key and Secret Access Key
Step 6 - complete the connector setup
- Select your
Authentication Methodbased on your choice in Step 3 - Fill in the parameters based on the values from Step 4 or Step 5
- Enter your
S3 Bucket Namebased on Step 1 - Fill in the rest of the parameters based on the descriptions in the setup page
Connection Settings
When S3 is utilized as a destination, you need to define the S3 Bucket Key which is essentially the path of the files written in the bucket.
Since the source writes different streams, and each stream has updates over time, we'd like to be able to write to different keys each time.
To facilitate that, the S3 Bucket Key parameter supports Macros that expand automatically by our code:
| macro | description | sample value |
|---|---|---|
{extension} | The extension for the file ("csv", "csv.gz", "jsonl", "jsonl.gz", "parquet") | csv |
{date_time} | The timestamp of when the actual load is taking place. Format is %Y_%m_%d_%H_%M_%S | 2025_04_14_11_23_45 |
{timestamp} | Same as date_time | 2025_04_14_11_23_45 |
{iso_date_time} | The timestamp of when the actual load is taking place. Format is ISO8601` | 2025-04-14T11:23:45Z |
{date} | The date of when the actual load is taking place. Format is %Y_%m_%d | 2025_04_14 |
{iso_date} | The date of when the actual load is taking place. Format is %Y_%m_%d | 2025-04-14 |
{year} | The year of when the actual load is taking place (zero-padded to 4 digits) | 2025 |
{month} | The month of when the actual load is taking place (01-12) | 04 |
{day} | The day of when the actual load is taking place (01-31) | 14 |
{hour} | The hour of when the actual load is taking place (00-23) | 11 |
{minute} | The minute of when the actual load is taking place (00-59) | 23 |
{second} | The second of when the actual load is taking place (00-59)` | 45 |
{stream_id} | The id of the stream | deadbeef-2359-567a-f5e8-83c536cb4de8 |
{stream_name} | The name of the stream | sales_summary_daily |
{connection_id} | The id of the connection (source->dest) | f52c7268-2359-567a-f5e8-83c536cb4de8 |
{connection_run_id} | The id that represents the run of the connection (across all streams) | fad1983d-7446-e5c4-bb46-4578affe02d5 |
{stream_run_id} | The id that represents the run of a specific stream within the run of the entire connection | 8e28c4bf-11aa-20aa-0ecf-d23c21c73285 |
{cursor_year} | The cursor is used by the source to determine what data to pull. This is the year portion of the cursor | 2025 |
{cursor_month} | The cursor is used by the source to determine what data to pull. This is the month portion of the cursor (01-12) | 04 |
{cursor_day} | The cursor is used by the source to determine what data to pull. This is the year portion of the cursor (01-31) | 14 |
{cursor_date_time} | The cursor is used by the source to determine what data to pull. This is the cursor value formatted as %Y_%m_%d_%H_%M_%S | 2025_04_14_11_23_45 |
{cursor_iso_date_time} | The cursor is used by the source to determine what data to pull. This is the cursor value formatted as ISO8601` | 2025-04-14T11:23:45Z |
{cursor_singular_date_time} | The cursor is used by the source to determine what data to pull. This is the cursor value formatted as %Y-%m-%d-%H-%M-%S | 2025-04-14-11-23-45 |